
Product disapprovals and misleading checkout totals are two of the most common results of missing or incorrect shipping data in a Google Shopping feed. Product Feed Pro solves this by reading your WooCommerce shipping configuration and passing it directly to Google Merchant Center. If you’d rather not manage shipping in your feed, you can define it inside Merchant Center instead.
This guide walks you through both approaches.
Prerequisites
- WooCommerce shipping zones and methods configured (WooCommerce → Settings → Shipping)
- Product Feed Pro or Product Feed Elite installed and active
Add shipping costs via your product feed
Set up shipping in WooCommerce
Before your products can pass accurate shipping data to Google Merchant Center, configure your WooCommerce shipping settings.
- Go to WooCommerce → Settings → Shipping.
- Create Shipping zones to define geographic areas — these can be as broad as an entire country or as specific as a ZIP code range.
- Within each zone, add Shipping methods such as Flat rate, Free shipping, or Local pickup. Configure rates, thresholds, and rules as needed.
- If you have products of varying sizes or weights, set up Shipping classes for more precise rate control.
- Order zones from most specific (local ZIP codes) to most general (“Rest of the world”) so WooCommerce matches the right rate.
For detailed instructions, see Setting up Shipping Zones on the WooCommerce documentation site.
Map shipping in your feed
Once WooCommerce shipping is configured, connect it to your product feed.
- Go to Product Feed → Manage Feeds.
- Open the feed you want to update.
- Go to the Field Mapping tab.
- Click + Add field mapping.
- From the Google Shopping attributes dropdown, select Shipping (shipping).
- From the Value dropdown, select Shipping.
- Save the feed and refresh it so the updated shipping data is included.

With this mapping in place, Product Feed Pro reads your WooCommerce shipping rates and passes them to Google Merchant Center in the correct g:shipping format.
Supported third-party shipping plugins
Product Feed Pro also calculates shipping rates from these third-party plugins:
- Table Rate Shipping for WooCommerce (by WooCommerce)
- Table Rate Shipping for WooCommerce (by Bolder Elements)
- WooCommerce Advanced Free Shipping (by Jeroen Sormani)
Shipping settings in Product Feed Pro
You can control how shipping methods are included in your feed from Product Feed → Settings → General. These settings apply to Google Shopping and Facebook feeds.
| Setting | What it does |
|---|---|
| Add shipping costs for all countries to your feed (Google Shopping / Facebook only) | Includes shipping data from all WooCommerce shipping zones, not just the feed’s target country |
| Remove all other shipping classes when free shipping criteria are met (Google Shopping / Facebook only) | When free shipping applies, this setting removes all other methods so only the free option appears in the feed |
|---|
| Remove the free shipping zone from your feed (Google Shopping / Facebook only) | Excludes free shipping methods from the feed |
|---|---|
| Remove the local pickup shipping zone from your feed (Google Shopping / Facebook only) | Excludes local pickup methods from the feed. Enable this if local pickup isn’t relevant for online shoppers |
Add shipping costs in Google Merchant Center
If you’d rather manage shipping rules directly in Merchant Center, follow these steps.
Go to Shipping and returns
- In Google Merchant Center, go to Shipping and returns in the left menu.
- Click Get Started under Shipping policies.
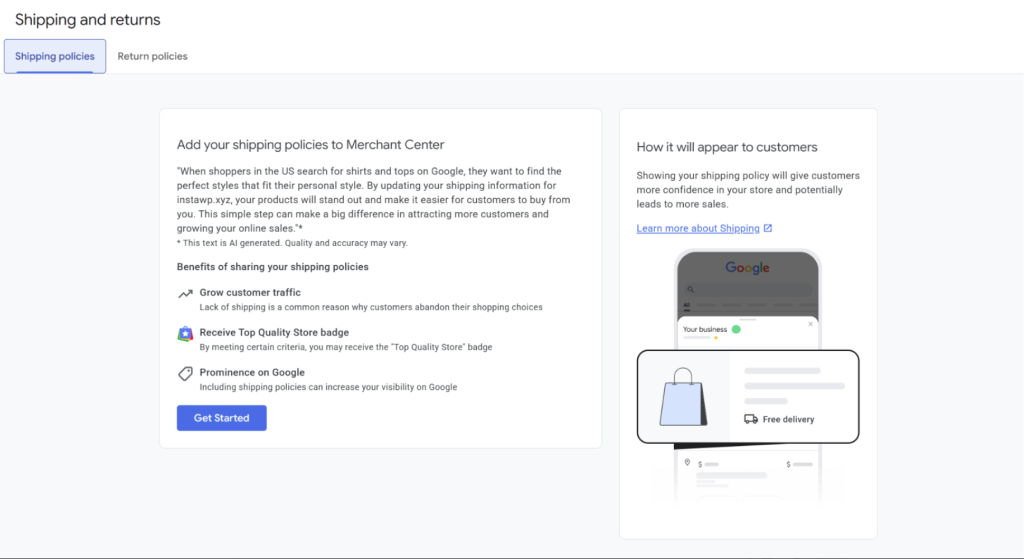
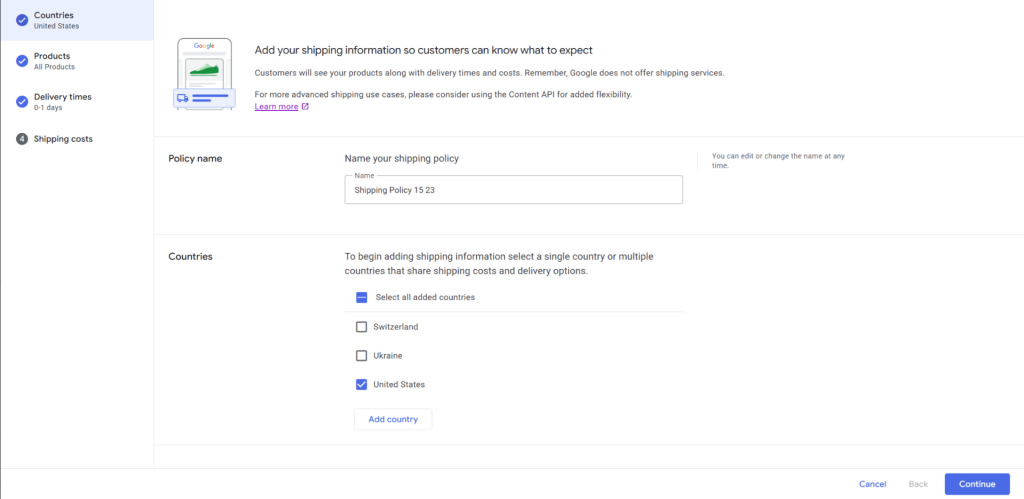
Create a new shipping policy
- Enter a clear policy name (e.g., US Standard Shipping).
- Select the countries where the policy applies.
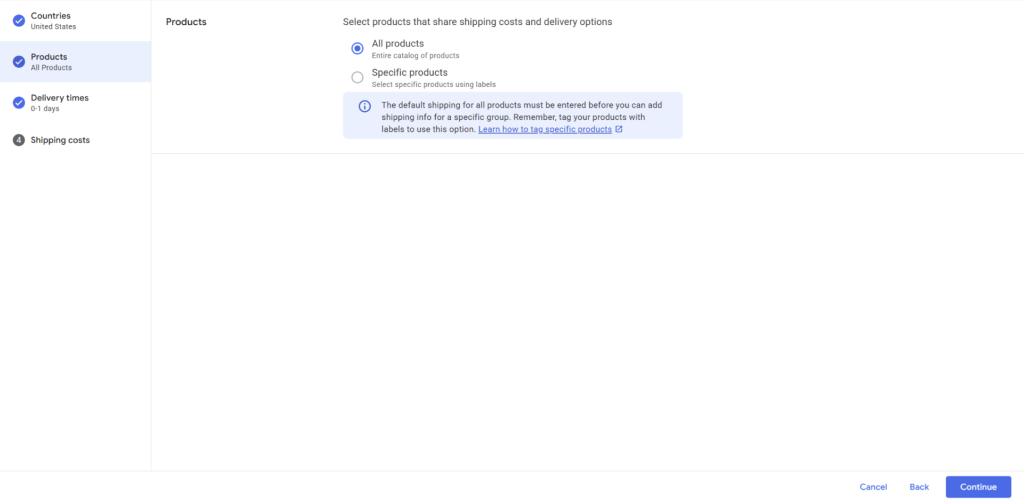
Choose products covered
- Select All products if this policy applies store-wide.
- Select Specific products if you want to apply the rule only to products tagged with a shipping label (see Using shipping labels below).
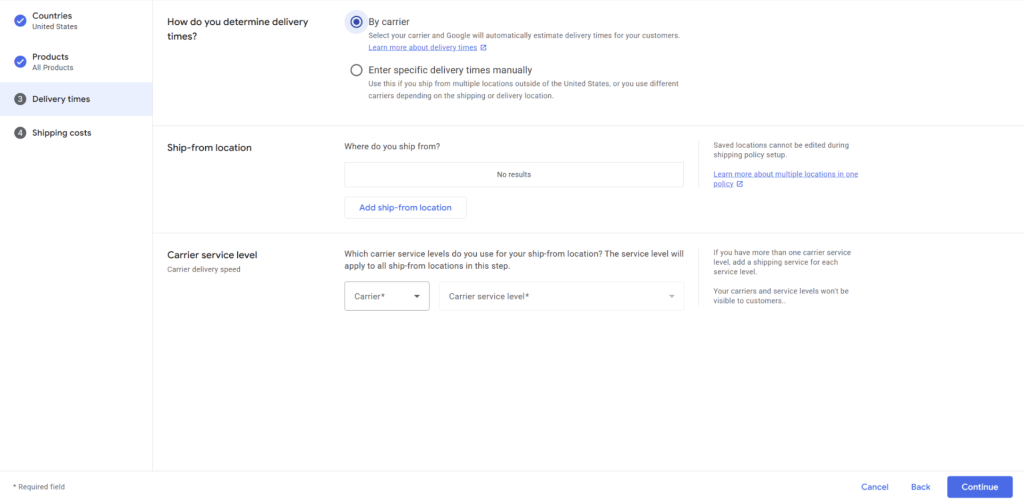
Define delivery times
Option A — By carrier
- Select By carrier.
- Click Add ship-from location and enter a location name, street address, city, region, ZIP code, max handling time, and order cutoff time. Click Add.
- Choose a carrier (e.g., UPS, FedEx, USPS — varies by country) and a service level (e.g., Ground, 2-Day, Overnight).
Option B — Enter manually
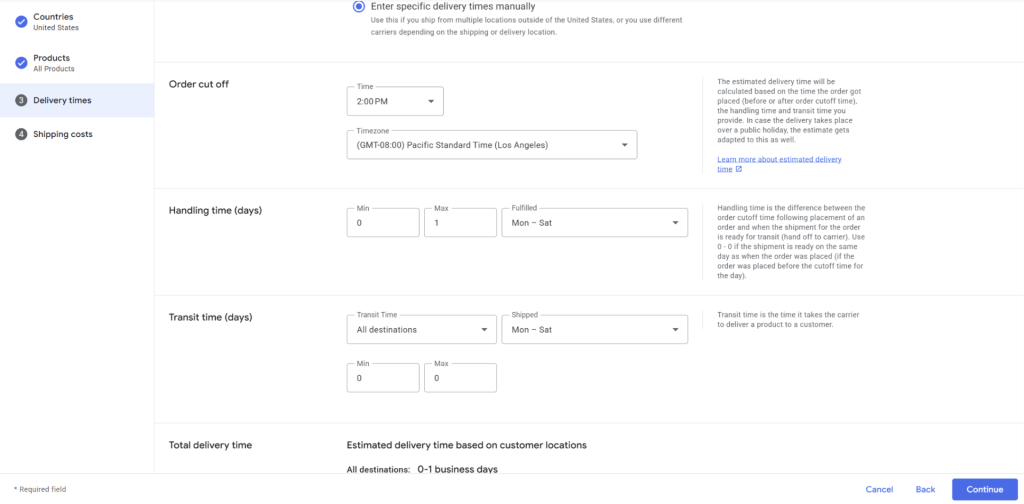
- Select Enter specific delivery times manually.
- Set the order cutoff time, handling time, and transit time.
- Google calculates the total delivery window that shoppers will see.
Define shipping costs
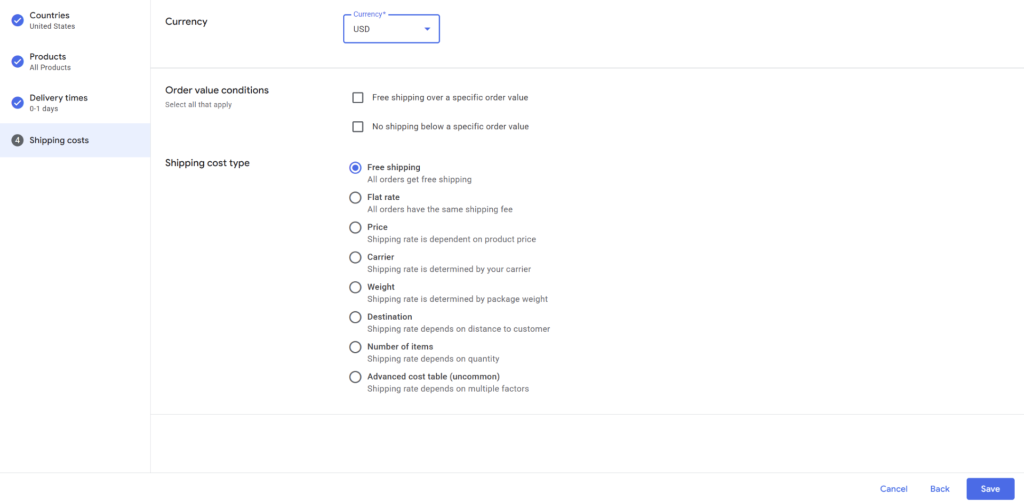
Choose how customers are charged:
- Free shipping — all orders ship free
- Flat rate — one fixed fee for all orders
- Price-based — costs depend on order value (e.g., free shipping over $50)
- Weight-based — fees depend on product or package weight
- Carrier-calculated — real-time rates from your shipping provider
- Destination-based — fees depend on delivery location
- Item-based — fees depend on the number of items
- Advanced cost table — combine multiple rules for complex needs
Save and apply
- Review your setup and click Save.
- Changes can take up to 24 hours to apply across your products.
Using shipping labels (optional)
Shipping labels let you group products so you can apply different shipping policies in Google Merchant Center. They don’t appear on your storefront or affect WooCommerce checkout — they’re used purely for feed and policy management.
Create a shipping label attribute in WooCommerce
Already using WooCommerce Shipping classes? Product Feed Pro reads your shipping class assignments automatically — no custom attribute needed. Skip to Map the shipping label in your feed and select your shipping class from the Value dropdown instead of a custom attribute.
If you’re not using WooCommerce Shipping classes, you can create a custom attribute:
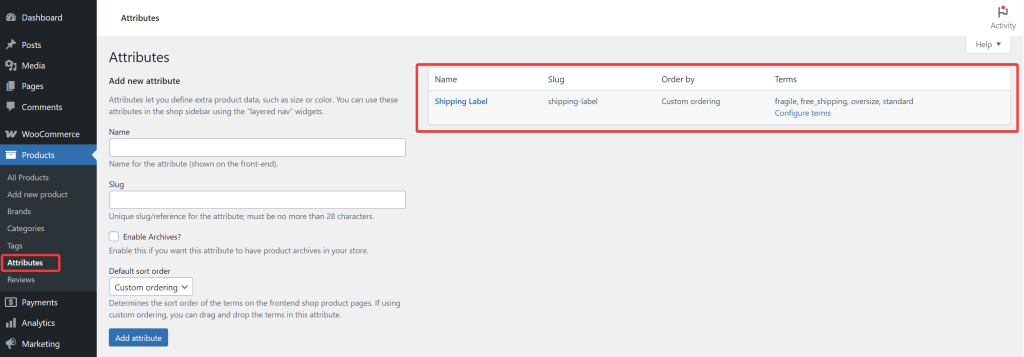
- Go to Products → Attributes in your WordPress dashboard.
- Add a new attribute called Shipping Label with a slug like
shipping-label. - Add terms that represent your product groups, for example:
standard,oversize,fragile,free_shipping.
Assign labels to products
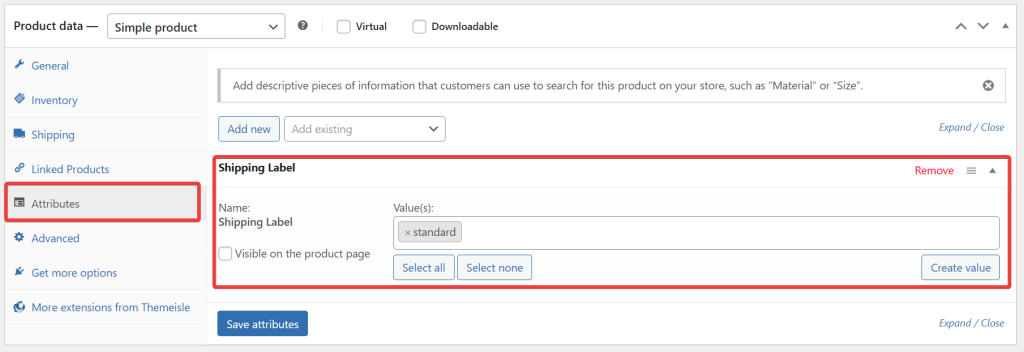
- Edit a product and open the Product data → Attributes tab.
- Select Shipping Label from the dropdown and click Add.
- In the Value(s) field, choose the correct term (e.g., Oversize for a sofa, Standard for a t-shirt).
- Leave Visible on the product page unchecked — this attribute is for feed use only.
- Click Update to save the product.
Repeat for all products that need a label.
Map the shipping label in your feed
- Go to Product Feed → Manage Feeds and open your feed.
- Go to the Field Mapping tab.
- Click + Add field mapping.
- From the Google Shopping attributes dropdown, select Shipping label.
- From the Value dropdown, select your custom shipping label attribute.
- Save and refresh the feed.

Apply labels in Merchant Center
- When creating or editing a shipping policy, choose Specific products instead of All products.
- Click Select products with labels and choose your
shipping_labelvalues. - Complete the delivery times and shipping costs setup as described in the Add shipping costs in Google Merchant Center section above.

Need more help?
If you’re on Product Feed Elite, open a support ticket and our team will get back to you.
If you’re using Product Feed Pro, open a new topic in the WordPress.org support forum.