

 Reviewed by
Creating a custom feed for your product listings is essential for e-commerce businesses that want to maximize their online presence.
Why? Simply put, custom feeds allow you to tailor your product information to meet the specific requirements of different sales channels. Thus, they ensure your products are accurately displayed and easily discovered by potential customers.
In this article, we’ll walk you through the process of creating a custom product feed, highlighting the key steps and best practices to help you achieve optimal results.
So let’s get right into it!
Table Of Contents
Why Create A Custom Feed For Your Product Listings?
Before we can understand the importance of custom product feeds, it’s crucial to understand a key feature of product feed plugins: product feed templates.
A product feed plugin or software is a tool used to create, manage, and optimize product feeds for various online platforms, such as comparison shopping engines, marketplaces, and advertising networks.
Now, a good product feed plugin offers feed templates, which streamline the process of setting up feeds for different sales channels. These templates are pre-configured to meet the specific requirements of such channels, ensuring that your product data is correctly formatted and optimized for visibility and performance.
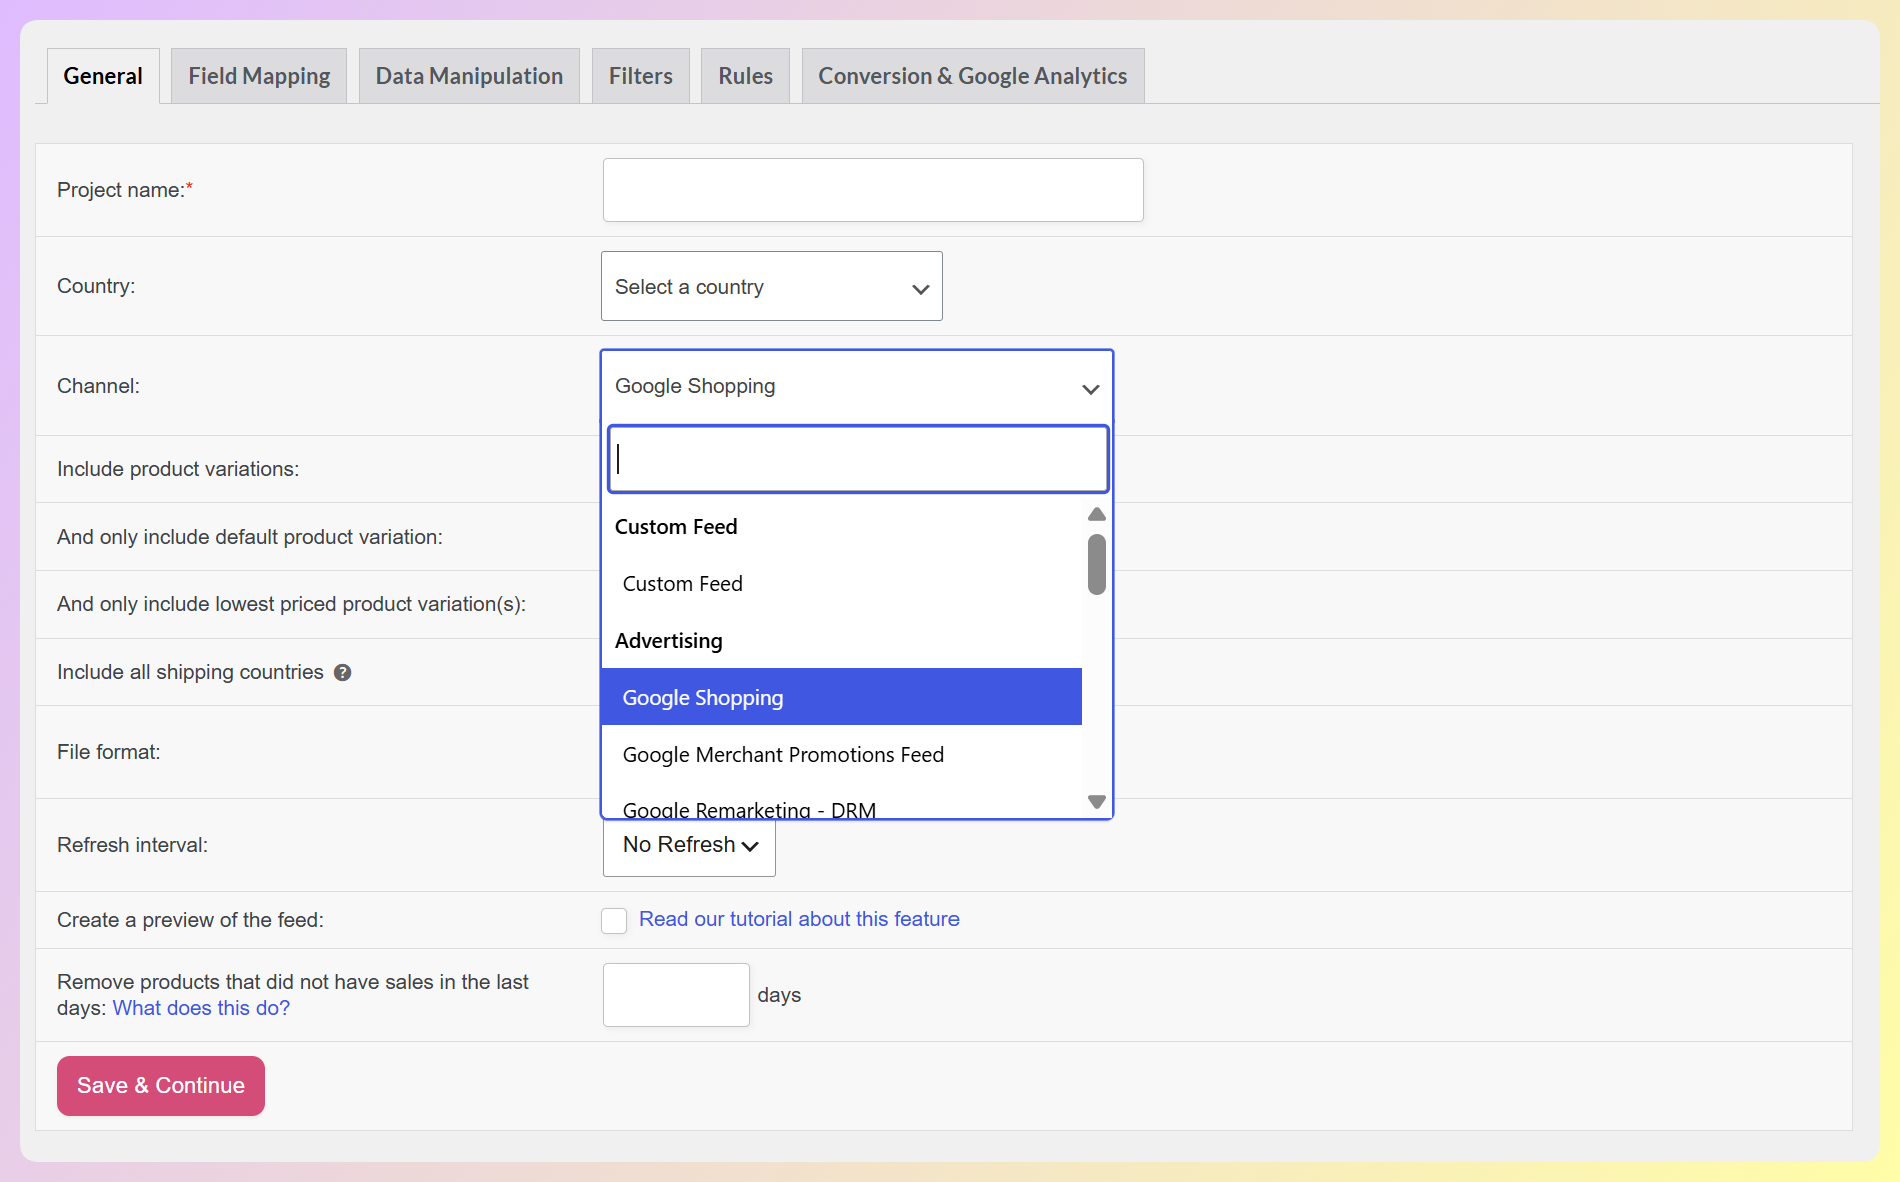
However, depending on your choice of plugin, it may not have the template for the sales channel you want to submit your product feed to. However, this doesn’t mean it’s impossible to showcase your product listings through your preferred channel.
With a custom product feed, you can set up the feed exactly as you need it, including in such a way that it meets the requirements of your preferred sales channel, even if a pre-configured template isn’t available. This flexibility allows you to tailor the feed to any platform’s unique specifications and formatting rules. Thus, it ensures that your product data is accurately and optimally displayed.
How To Create A Custom Feed For Product Listings
If you’d like to create a custom feed for your products, then you need the best tool available. This is where AdTribes comes in.
Offering both free and premium versions, AdTribes is a top-ranked product feed solution for WooCommerce platforms. And it’s got everything you need to showcase your offerings through sales channels all over the world, including a feature enabling you to create custom feeds.
Of course, for AdTribes to work, you must first ensure you already have an online store powered by WordPress and WooCommerce.
Once you’ve downloaded, installed, and activated AdTribes, you can access the plugin by heading to your WordPress dashboard and finding Product Feed in the sidebar. You’ll find the same menu whether you’re using the free version, AdTribes Product Feed Pro, or the premium one, AdTribes Product Feed Elite.
Take note: Product Feed Elite boasts additional features that empower you to create the ideal custom feed for your offerings. Thus, in the following tutorial, we’re going to assume that you’re using Product Feed Elite.
Now that you know how to access AdTribes, it’s time to learn how to create a custom feed!
Step 1: Configure your custom feed’s general settings
After navigating to Product Feed, click Create feed.
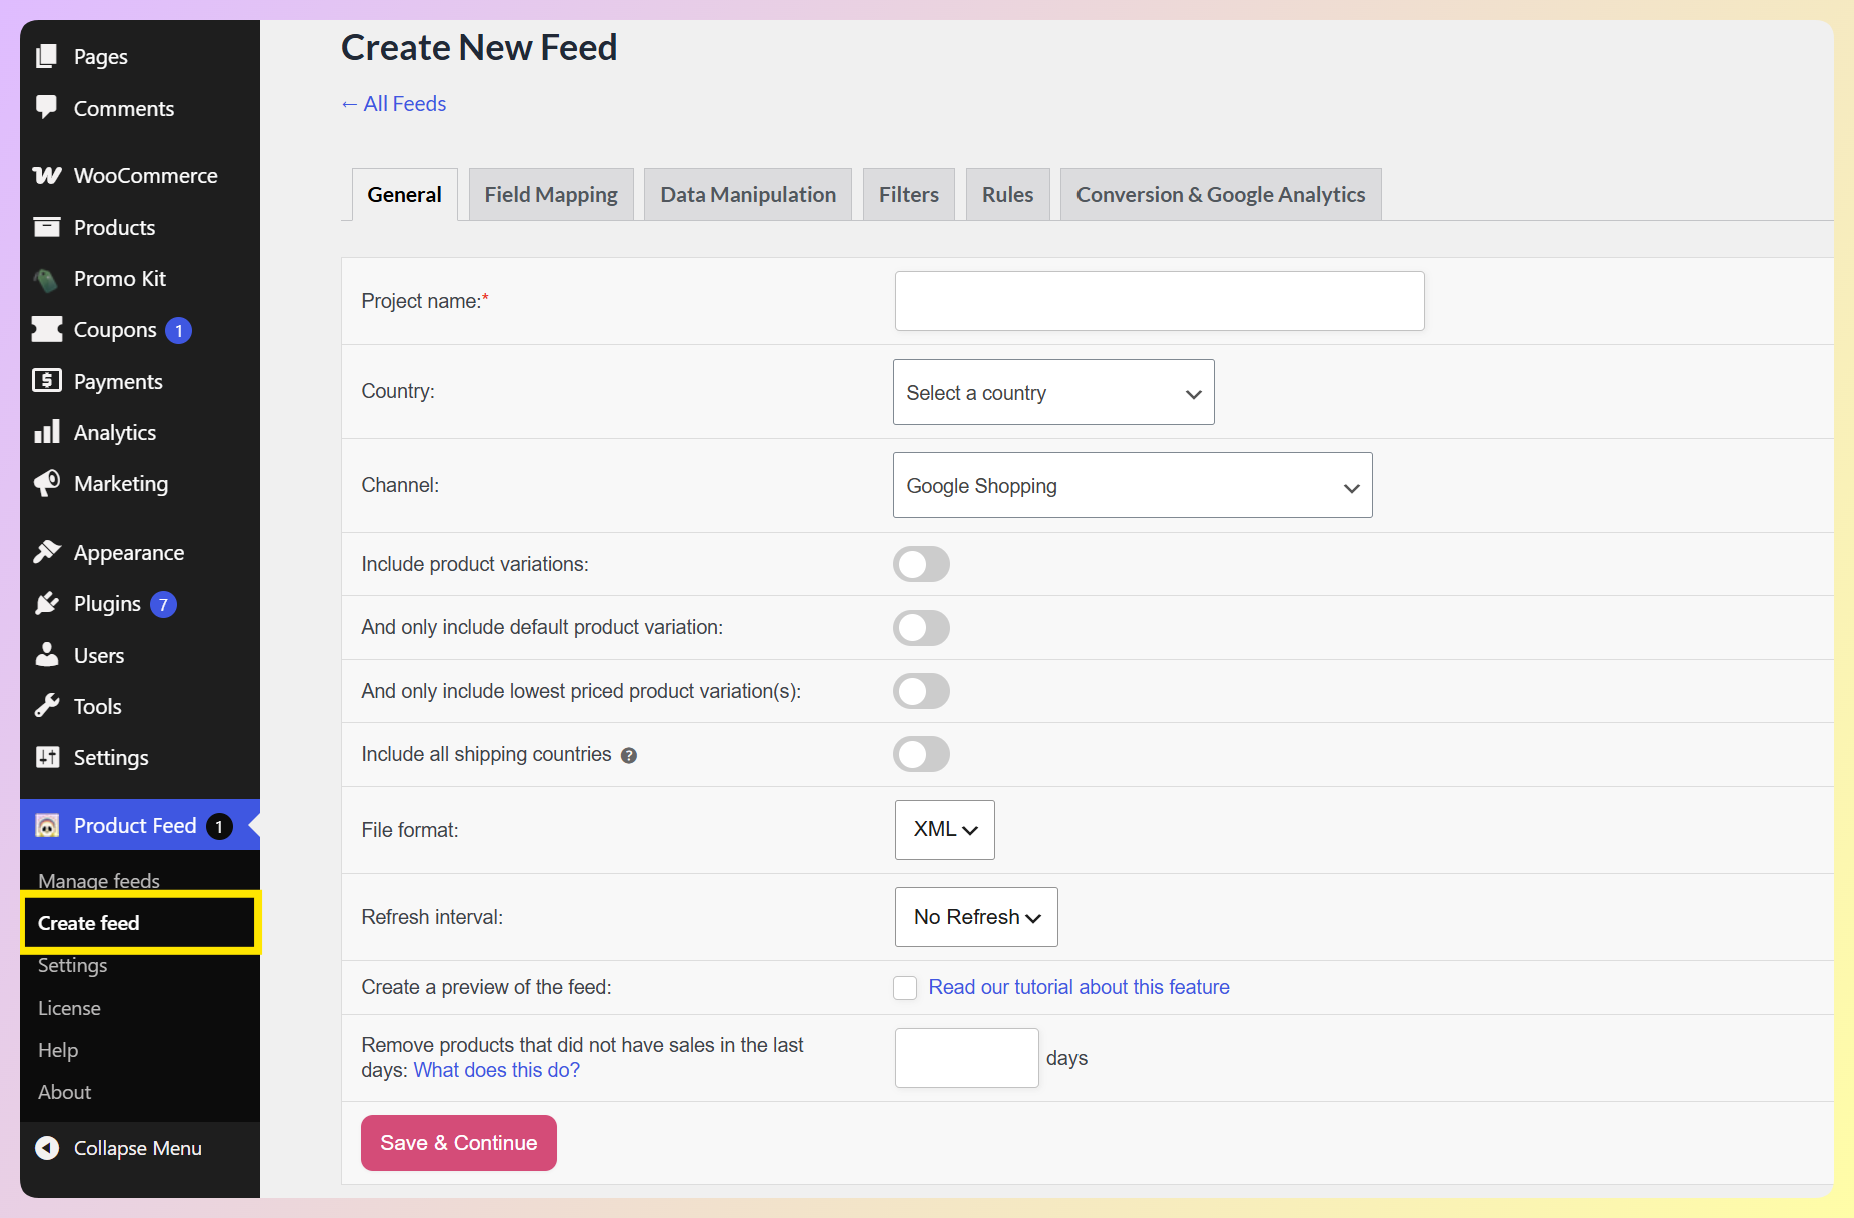
Here, on the General tab, you must configure your feed’s fundamental details. Start by giving your feed a Project name and selecting your target region from the Country dropdown.
Next, click the Channel dropdown. You have plenty of channels to choose from, but for this tutorial, we’re going with “Custom Feed.” To find it quickly, type “Custom” in the search box.
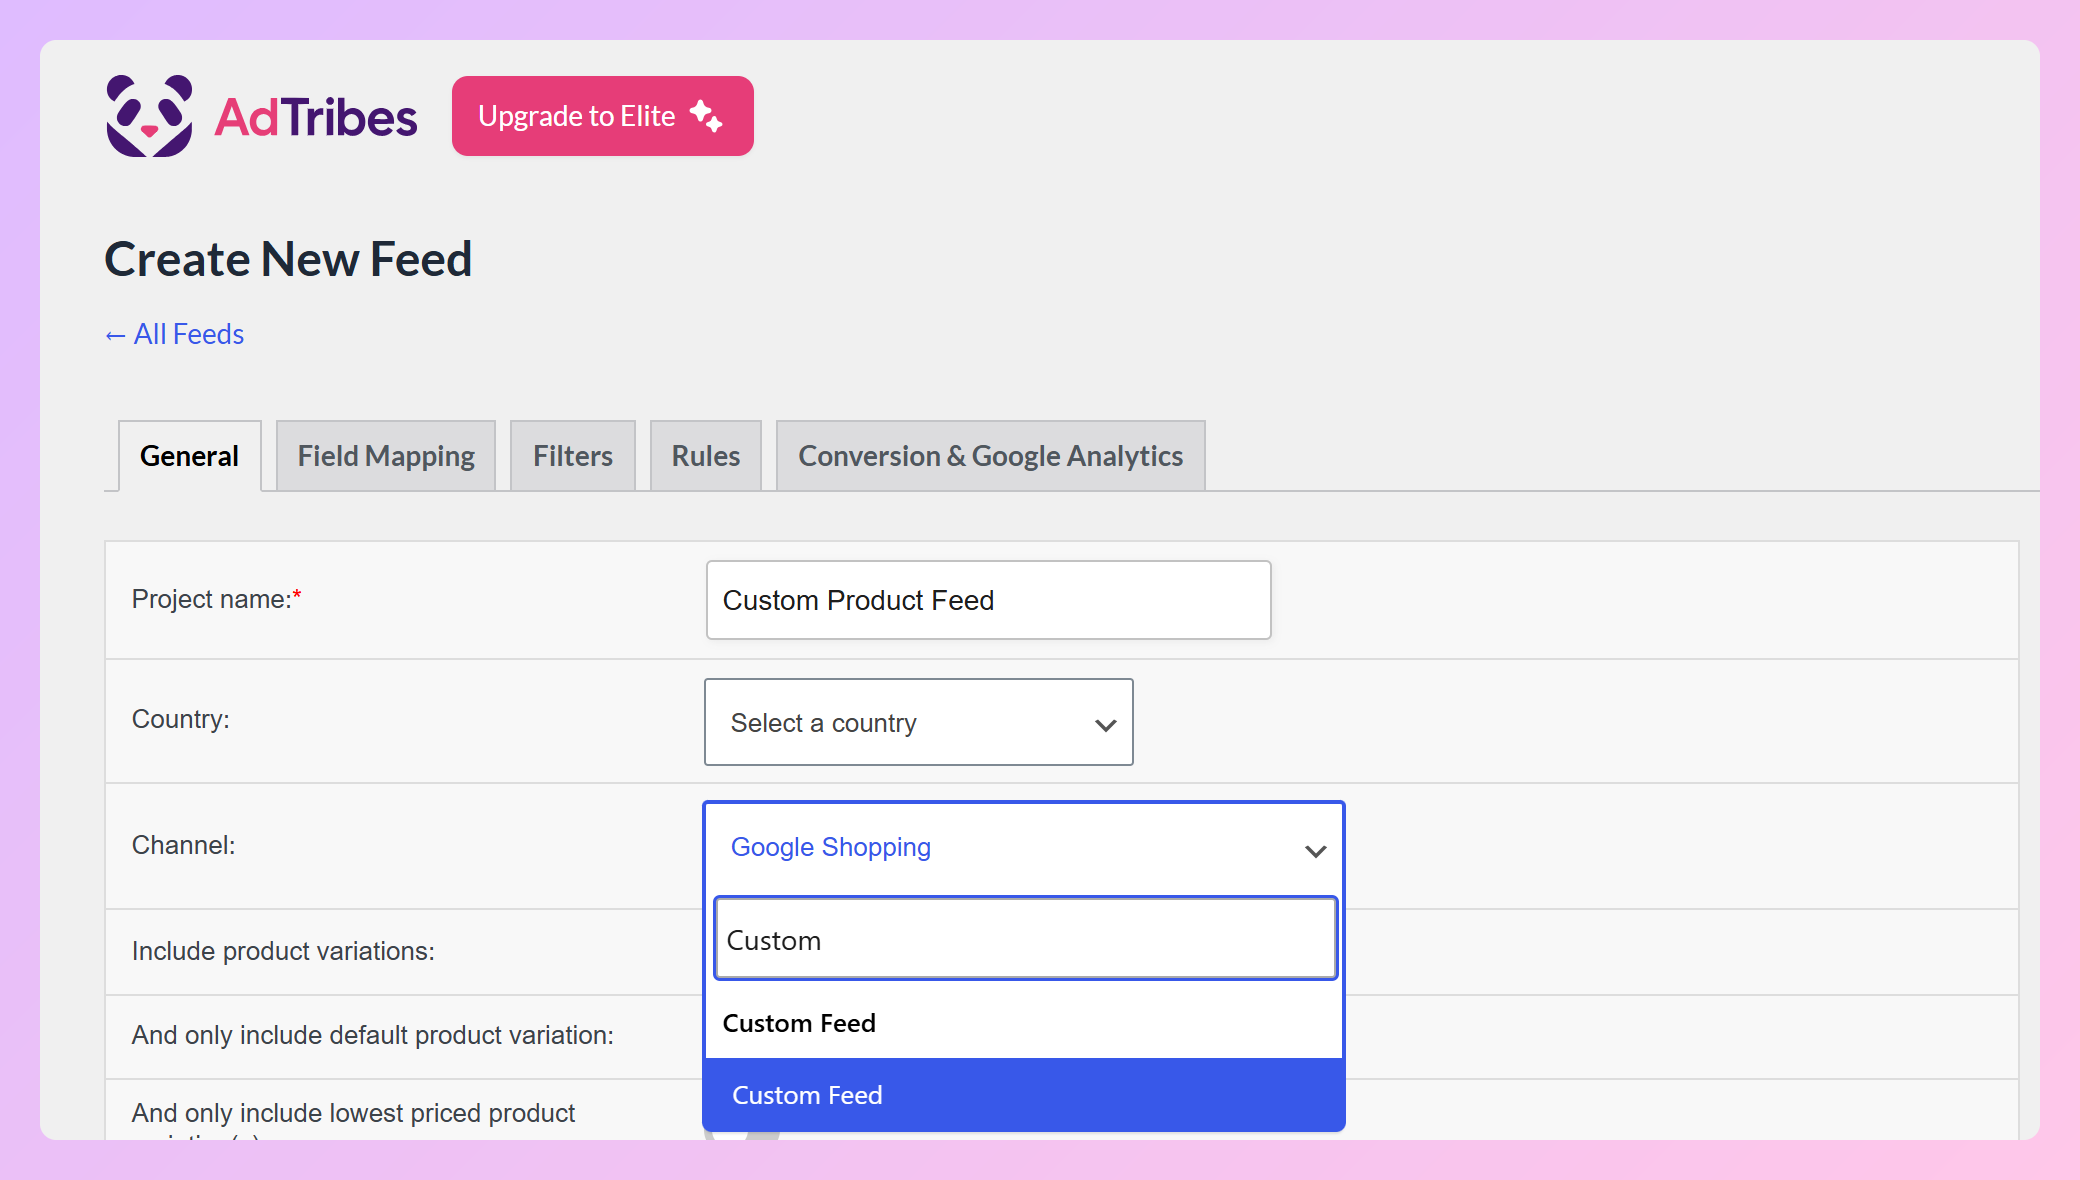
Of course, you must also decide on the File format for your custom feed to take. We recommend picking “XML” from the dropdown as it’s the format most channels accept.
As for the other options on this page, how you configure their settings is completely up to you.
For example, if you wish for your custom feed to include product variations, you can toggle on the Include product variations option. If you also want that same granularity on your shop pages, see this guide on displaying each variation as its own product. Furthermore, it’s a good idea to determine how you want your feed refreshed.
Once you’re happy with your General settings, click the Save & continue button to proceed to the next step.
Step 2. Perform field mapping
You must perform field mapping to ensure your product data aligns correctly with your preferred sales channel’s required format. Thus, on the Field Mapping tab, you’ll be matching each of your custom feed’s Feed attributes with a Source from WooCommerce.
Basically, all you must do is pick the matching store field from each attribute’s Source from WooCommerce dropdown. For example, the “Product ID” attribute should use “Product Id” as its source.
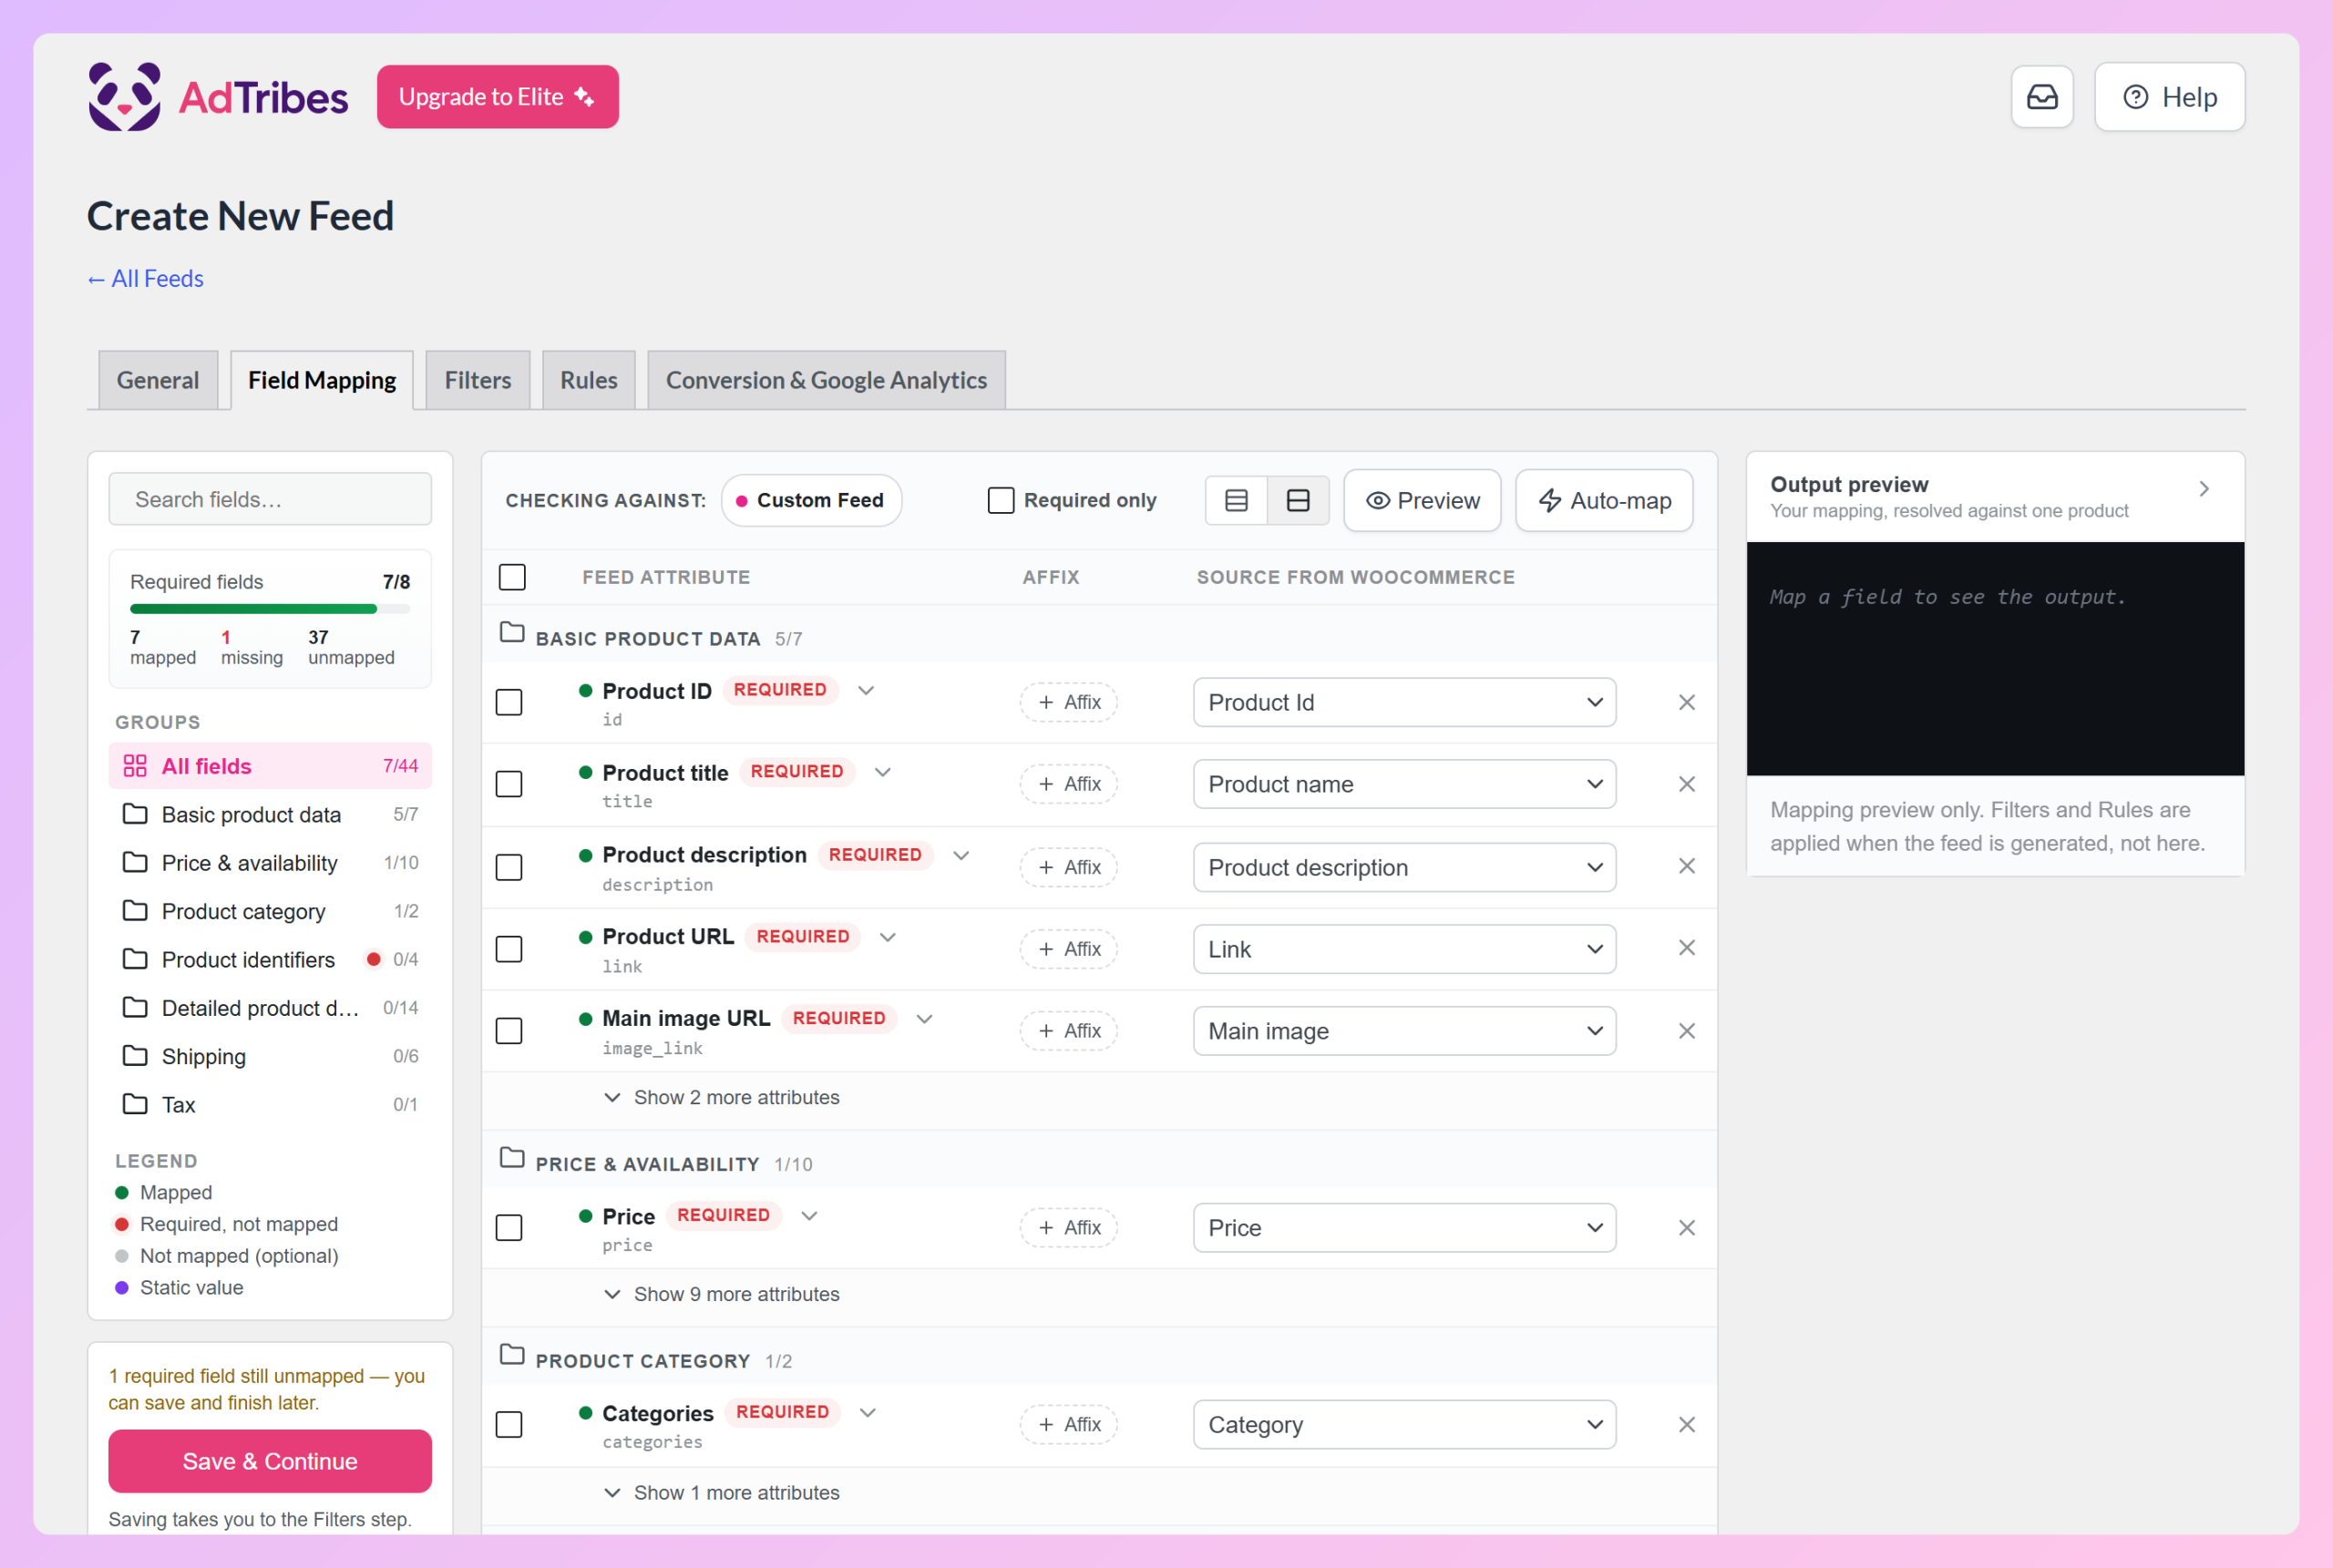
Thankfully, the plugin pre-fills most fields with the correct mappings, so you only have to complete the remaining ones. The Required fields counter in the sidebar shows how many still need a source.
For instance, in the image above, 7 of 8 required fields are mapped, and the “Brand” attribute in the Product identifiers group still needs a source. If you use WooCommerce’s built-in brands, open Brand’s Source from WooCommerce dropdown and pick “Brands.” To make your search easier, type the first few letters, like “brand,” to filter the list.
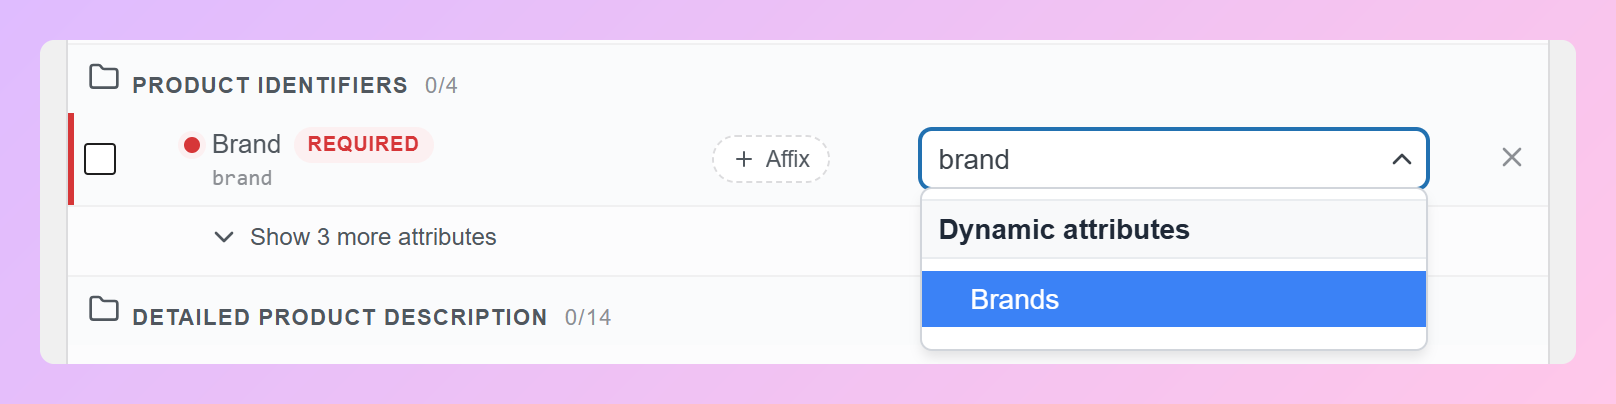
Take note that if you’d rather use dedicated identifier fields, AdTribes Product Feed Elite’s extra fields add Brand, GTIN, and MPN fields to your products, which you can then pick as sources.
Adding fields
We recommend adding extra fields to your custom feed so that it contains the attributes required by your preferred sales channel.
To add an extra field, click the + Add field mapping button. This shows every attribute the Custom Feed template offers, not just the ones in use, so you can pick a source for each one you need. Add as many extra fields as you need.
Furthermore, you can create custom fields by clicking the + Add custom field button. This adds a new row where you name your own attribute and then choose its source from the dropdown.
Take note: custom field names can only use letters, underscores, and hyphens. White spaces, numbers, and other special characters aren’t allowed.
If you need to delete any fields, tick their row checkboxes, followed by the Delete button.
Click the Save & Continue button to move on to the next step.
Step 3: Use filters and rules (optional)
While this step is completely optional, it can be extremely useful. After all, the Filters and Rules tabs grant you a fine degree of control over the information your feed displays.
For one thing, filters enable you to manipulate your feed so that your chosen sales channels showcase specific products only. For another, rules allow you to alter details about your products.
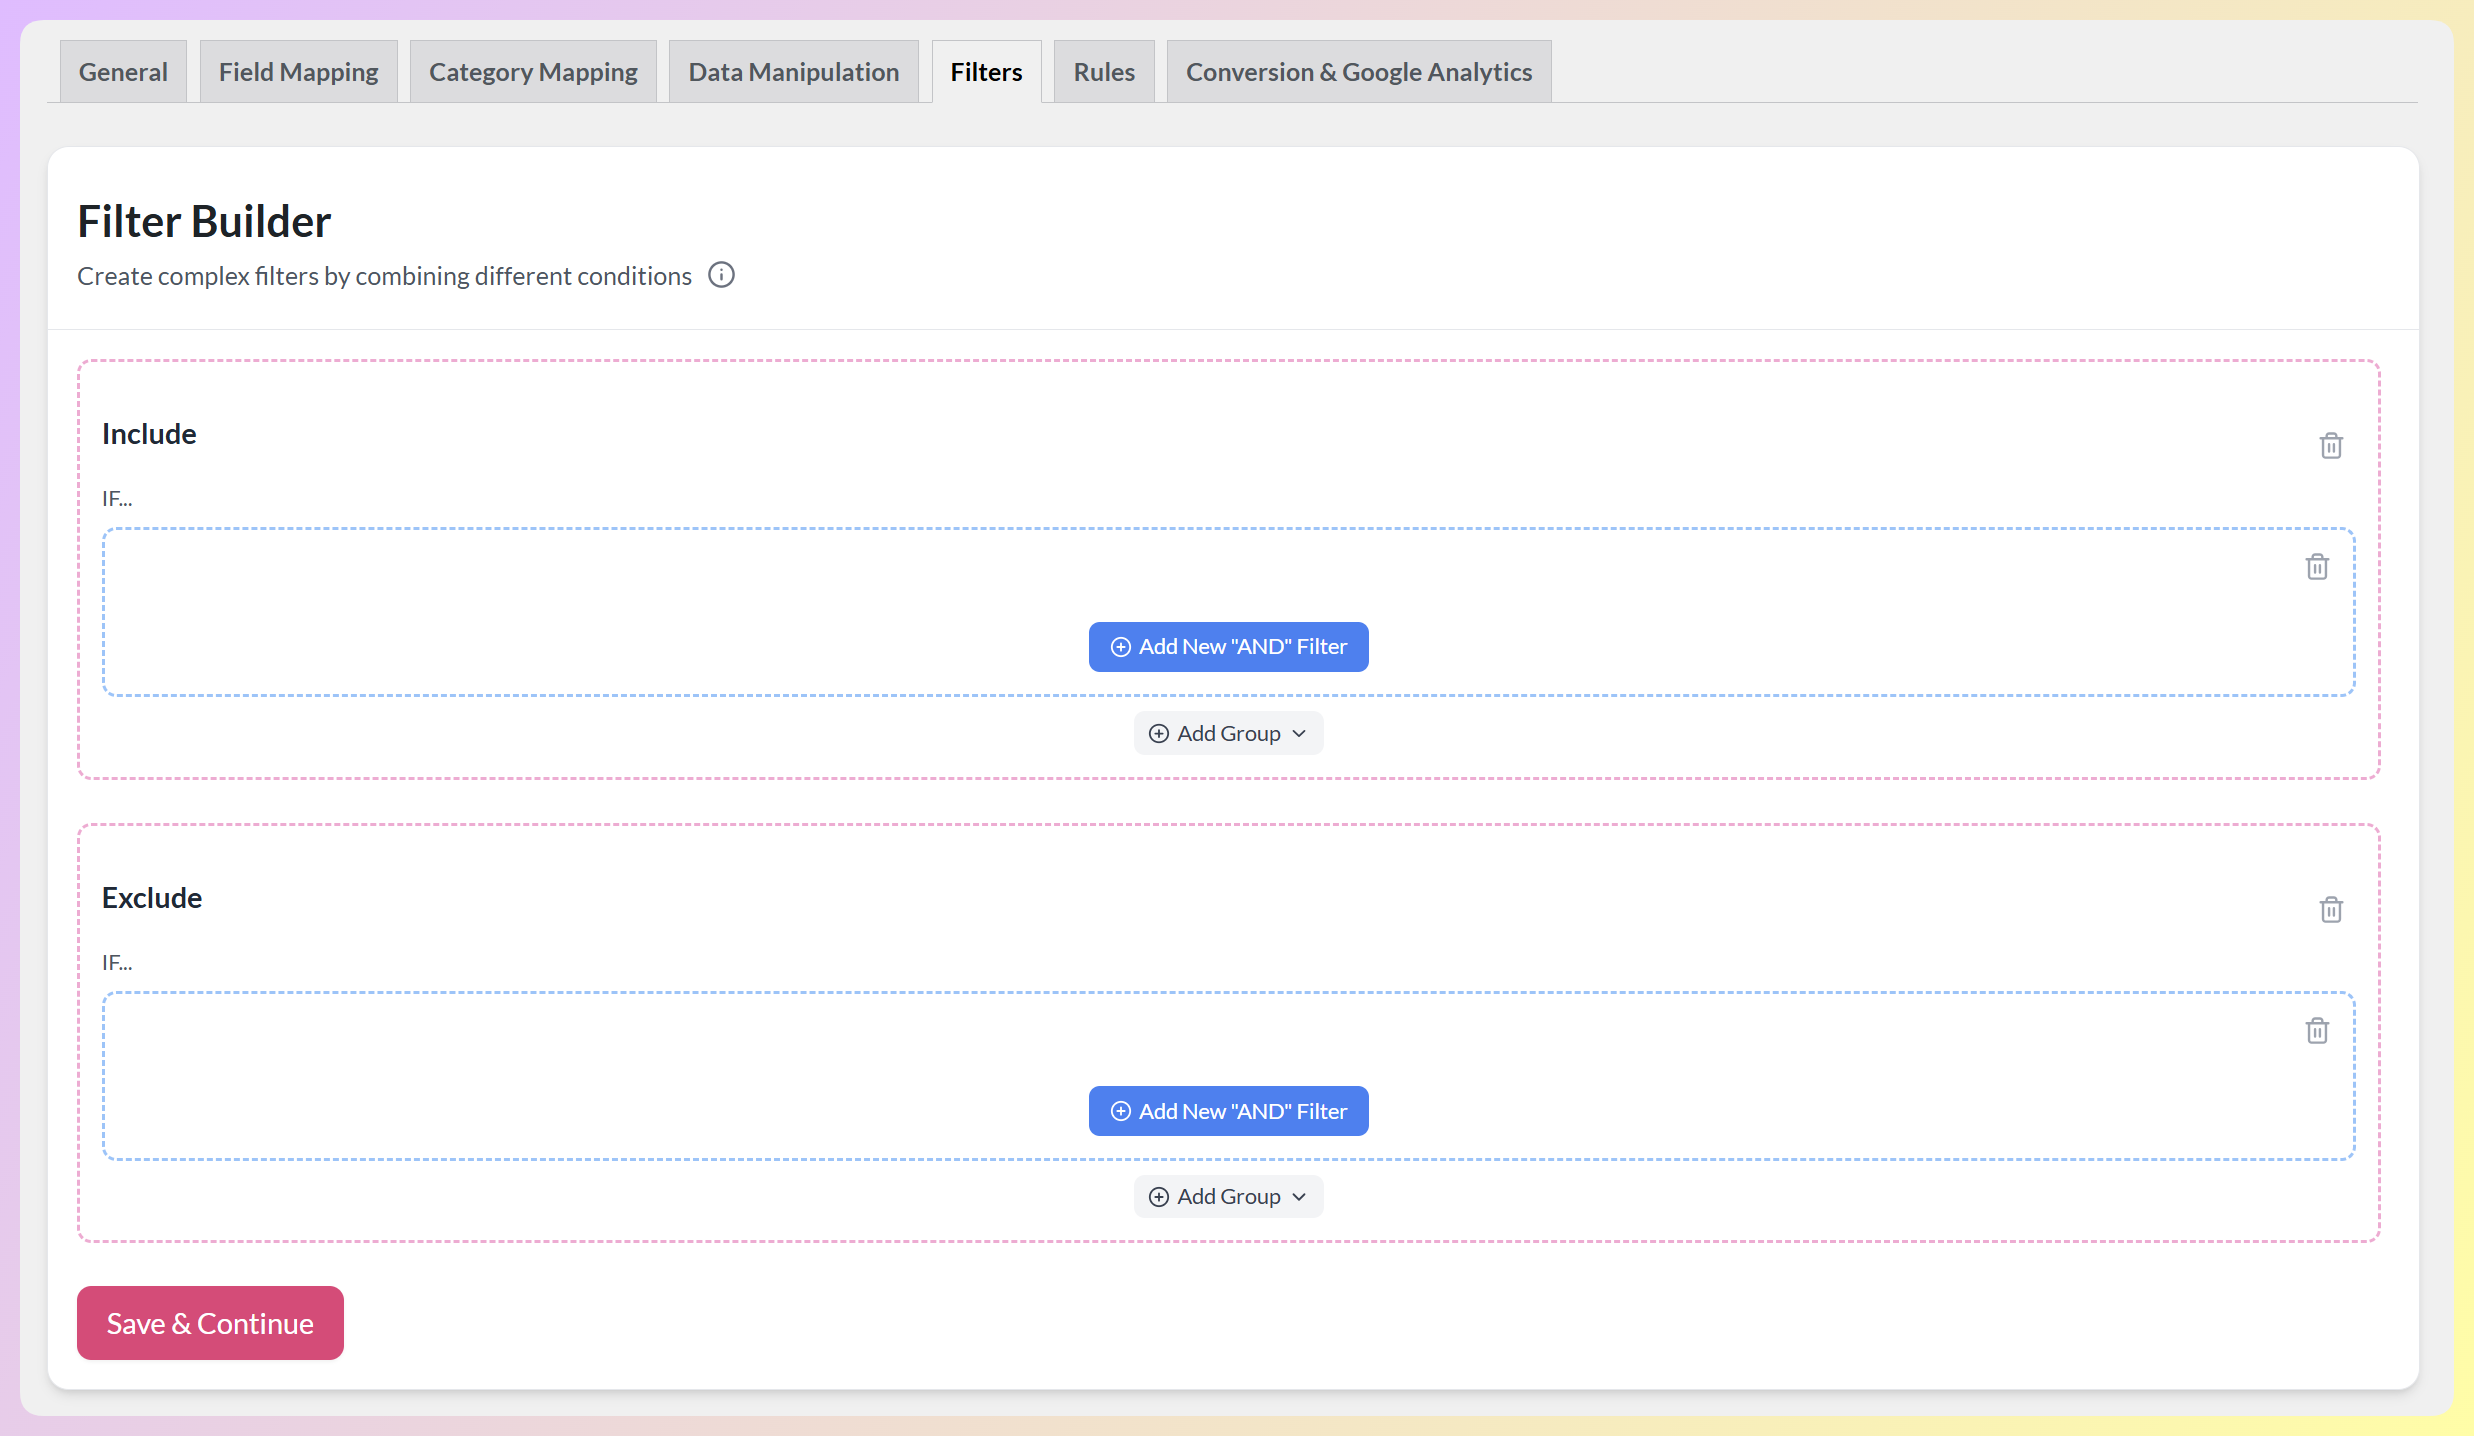
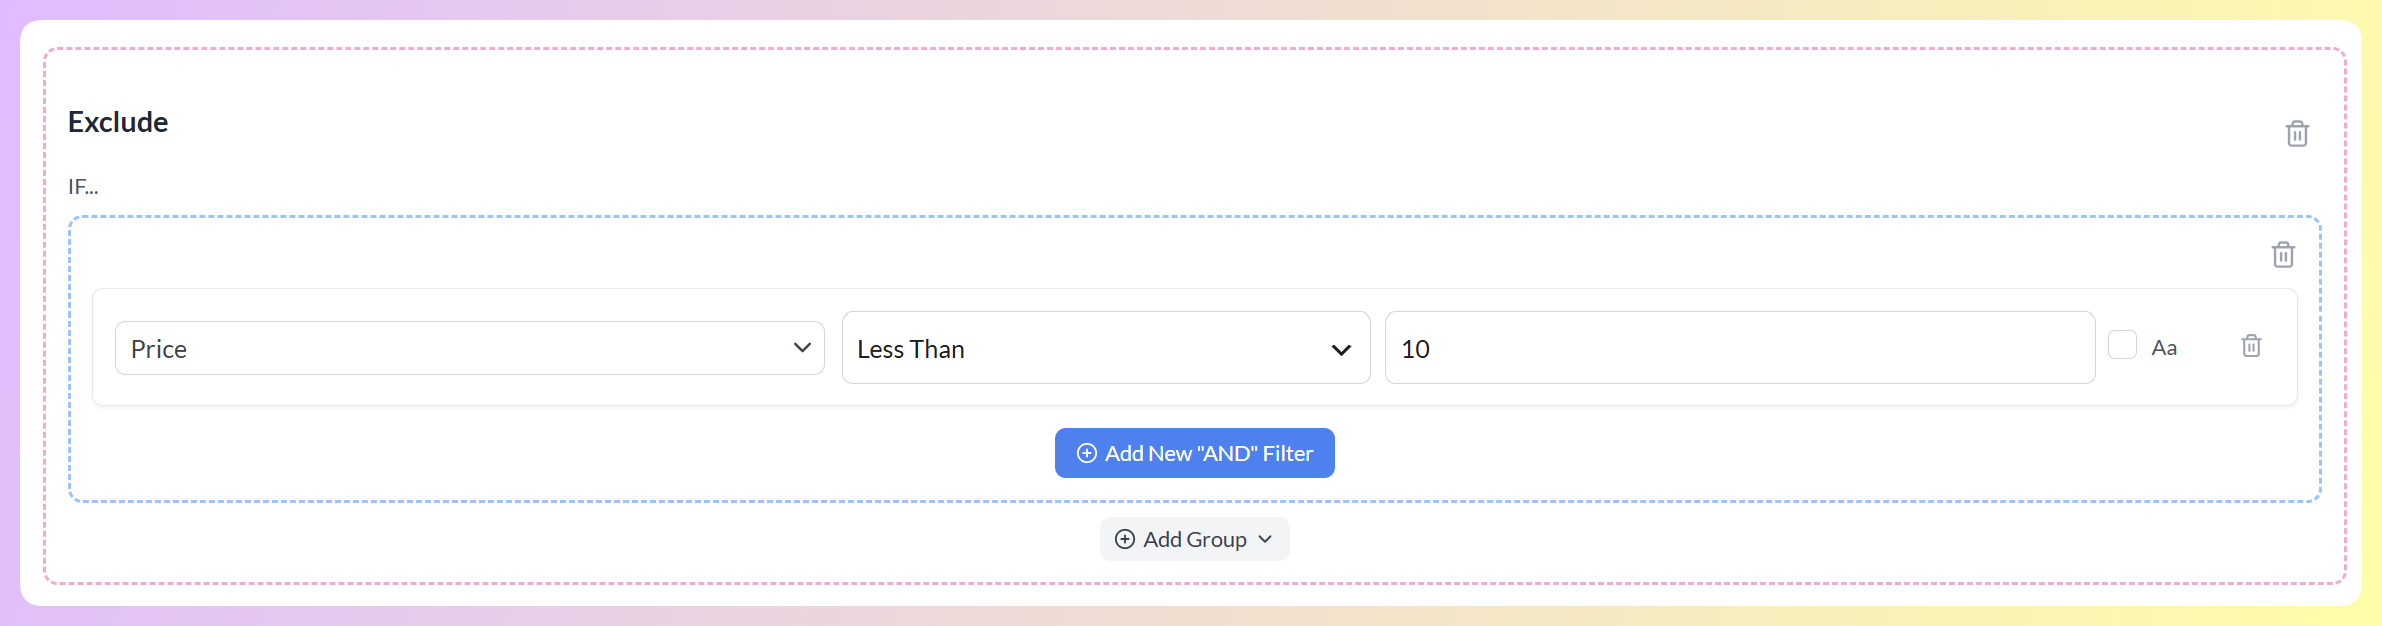
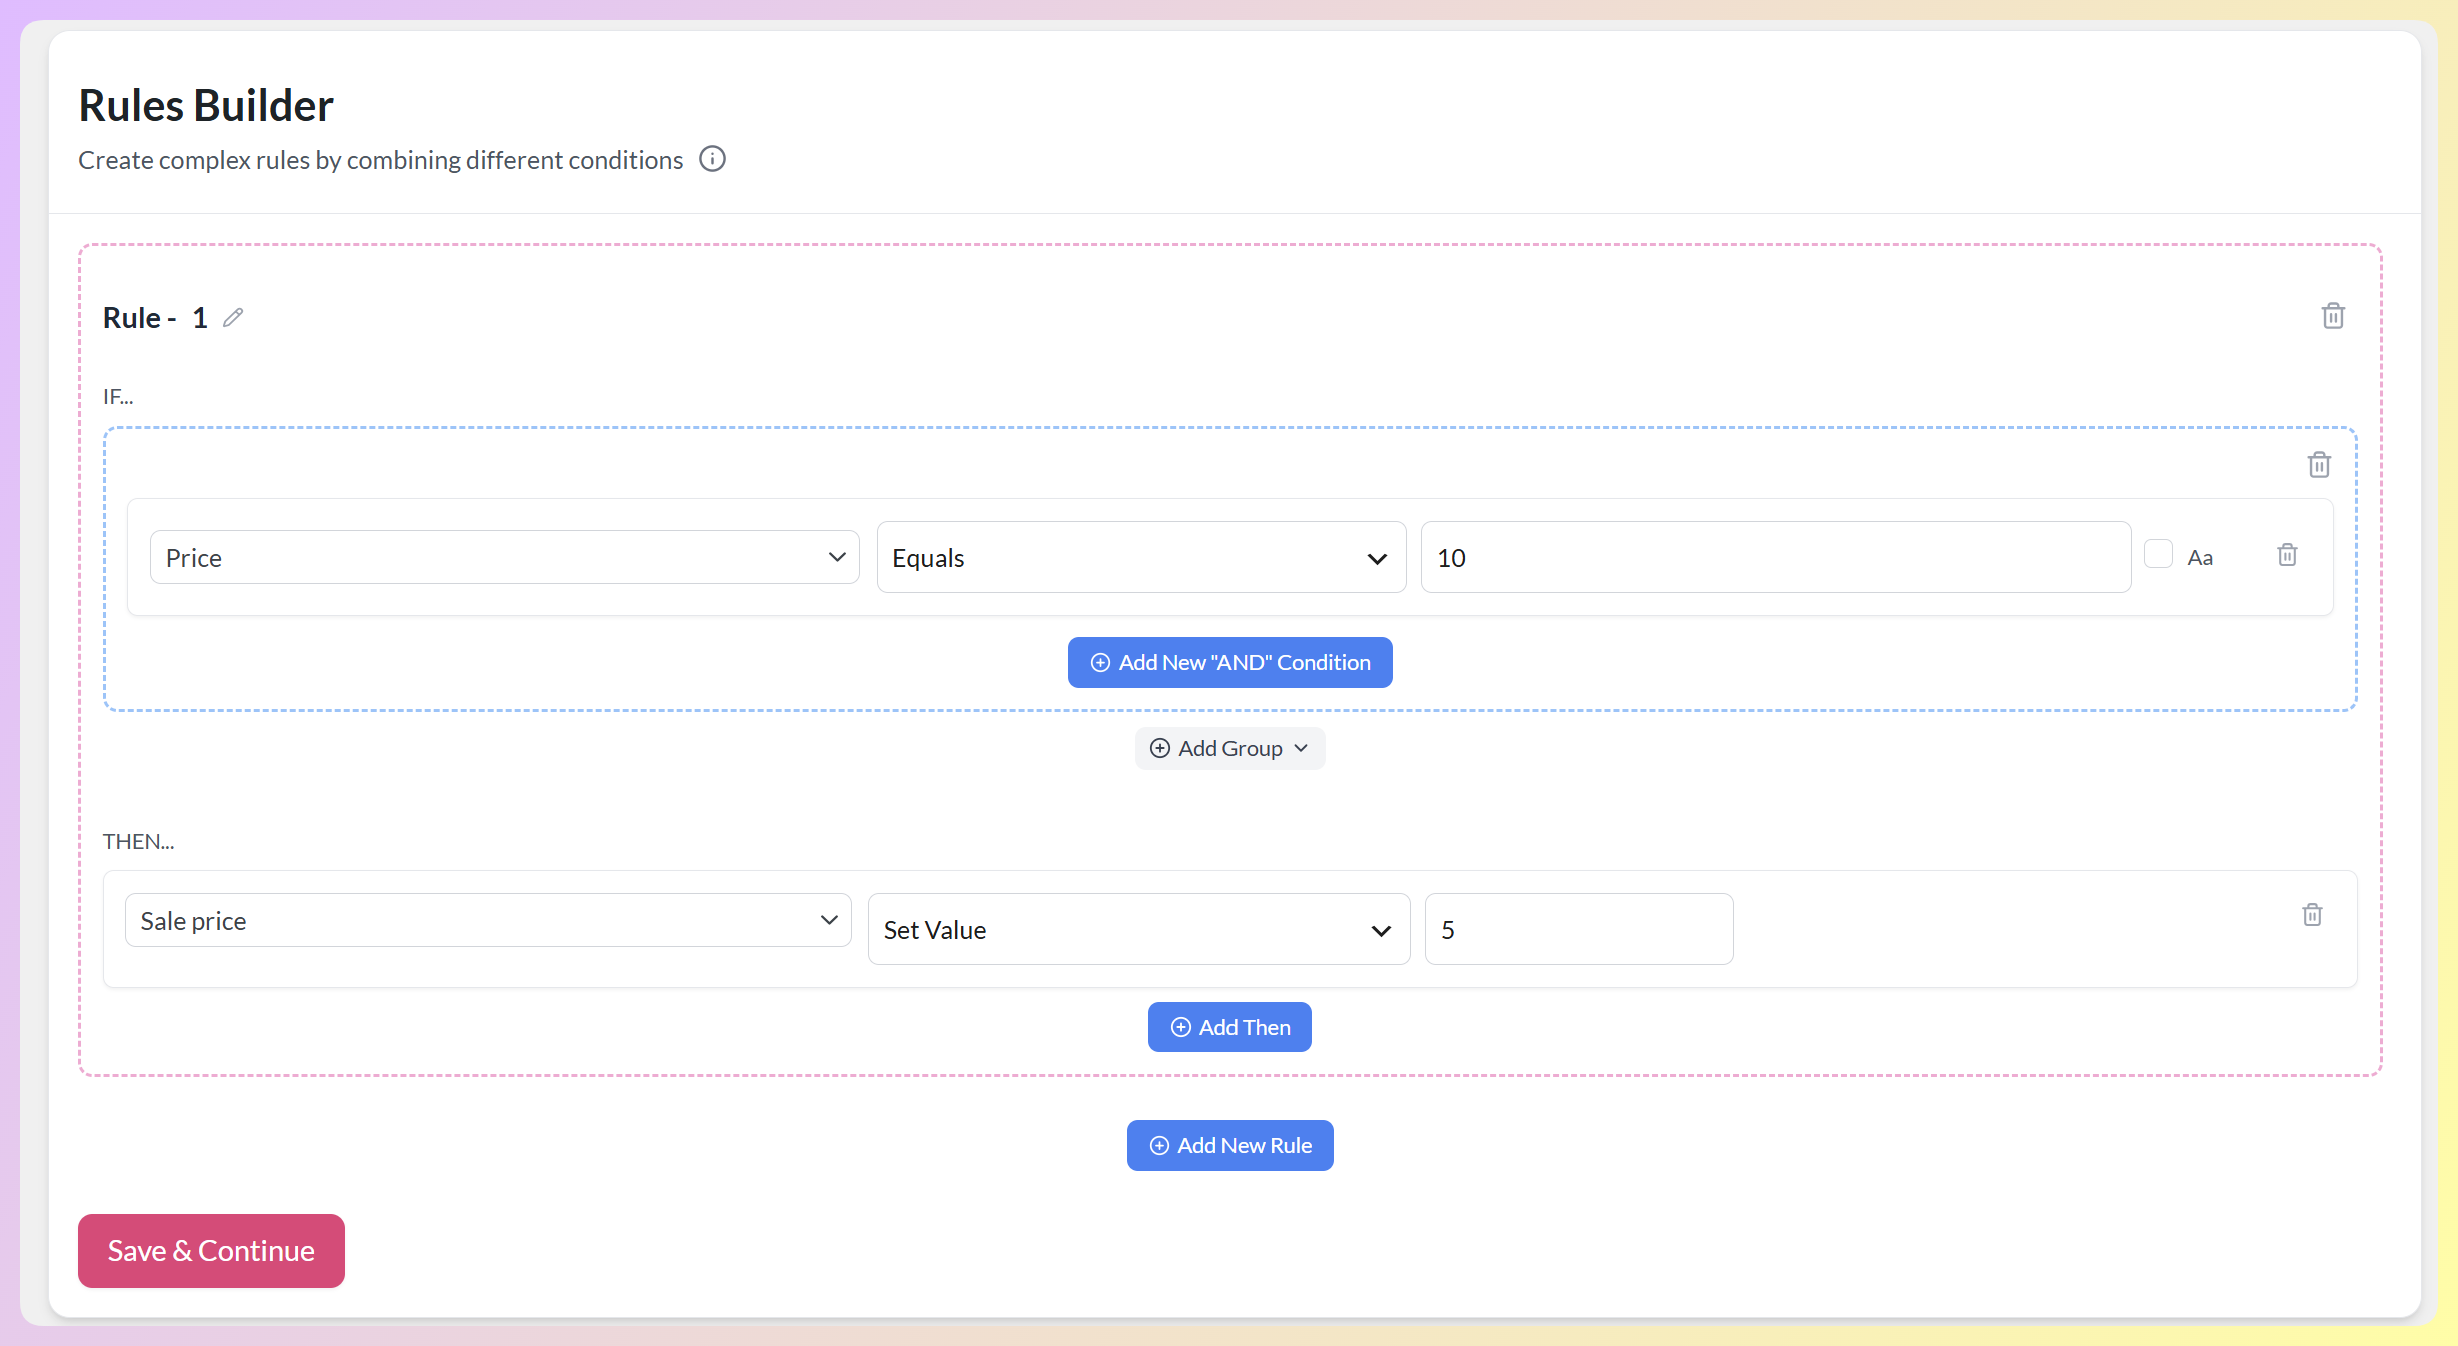
For example, you can create an Exclude filter that removes products under a certain price, and a rule that gives specific products a sale price, like in the examples below. Filters and rules are particularly useful for highlighting special deals during major sales events like Christmas, Black Friday, Valentine’s Day, and more.
To create a filter, open the Filters tab and click Add New “AND” Filter in the Include or Exclude section. You can also click Add Group to combine conditions. For more information and examples on filters, check out this document as well as this one.
To create a rule, open the Rules tab, set your conditions, then choose what happens in the “THEN” part of the rule. Click Add New Rule to add another one. For more information and examples on rules, read this document.
If you want to delete a filter or rule, click its trash icon.
Not sure where to start? Our product feed guide walks through both tabs in more detail.
Click the Save & Continue button to proceed to the next step.
Step 4: Configure your Conversion & Google Analytics settings (optional)
This is another optional step. However, it can also be of great help, as the Conversion & Google Analytics tab lets you track the results of your campaign.
To enable tracking, simply toggle on the Enable Google Analytics tracking option:
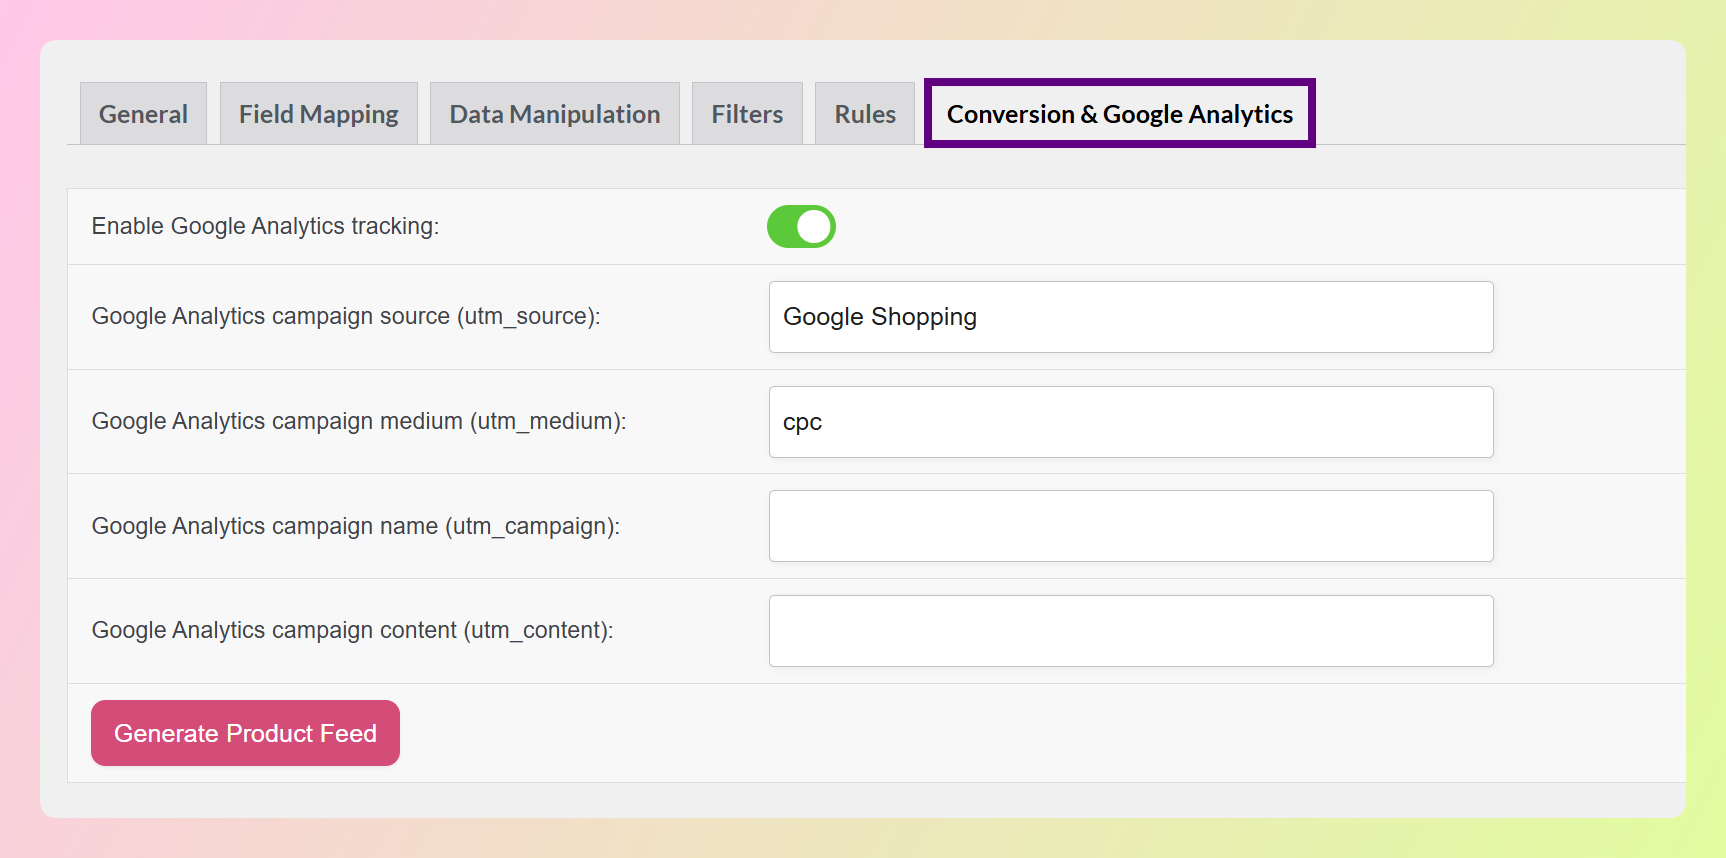
Then, you have to set the values for the UTM parameters in the available fields.
When you’re done, click the Generate Product Feed button. And that’s it! You’ve just created your very own custom feed. What’s more, it’s ready to launch!
How To Upload Your Custom Feed To A Sales Channel
Of course, creating a custom feed is pointless if you don’t submit it to a sales channel for showcasing. Thankfully, the submission process is simple and quick.
Step 1: Acquire your custom feed URL
Immediately after using AdTribes to generate your custom feed, you’ll be redirected to the plugin’s Manage feeds page. This includes a list of all the feeds you’ve created.
Find the feed you just created. Its URL is listed in the Feed URL column, and you can click the copy icon next to it.
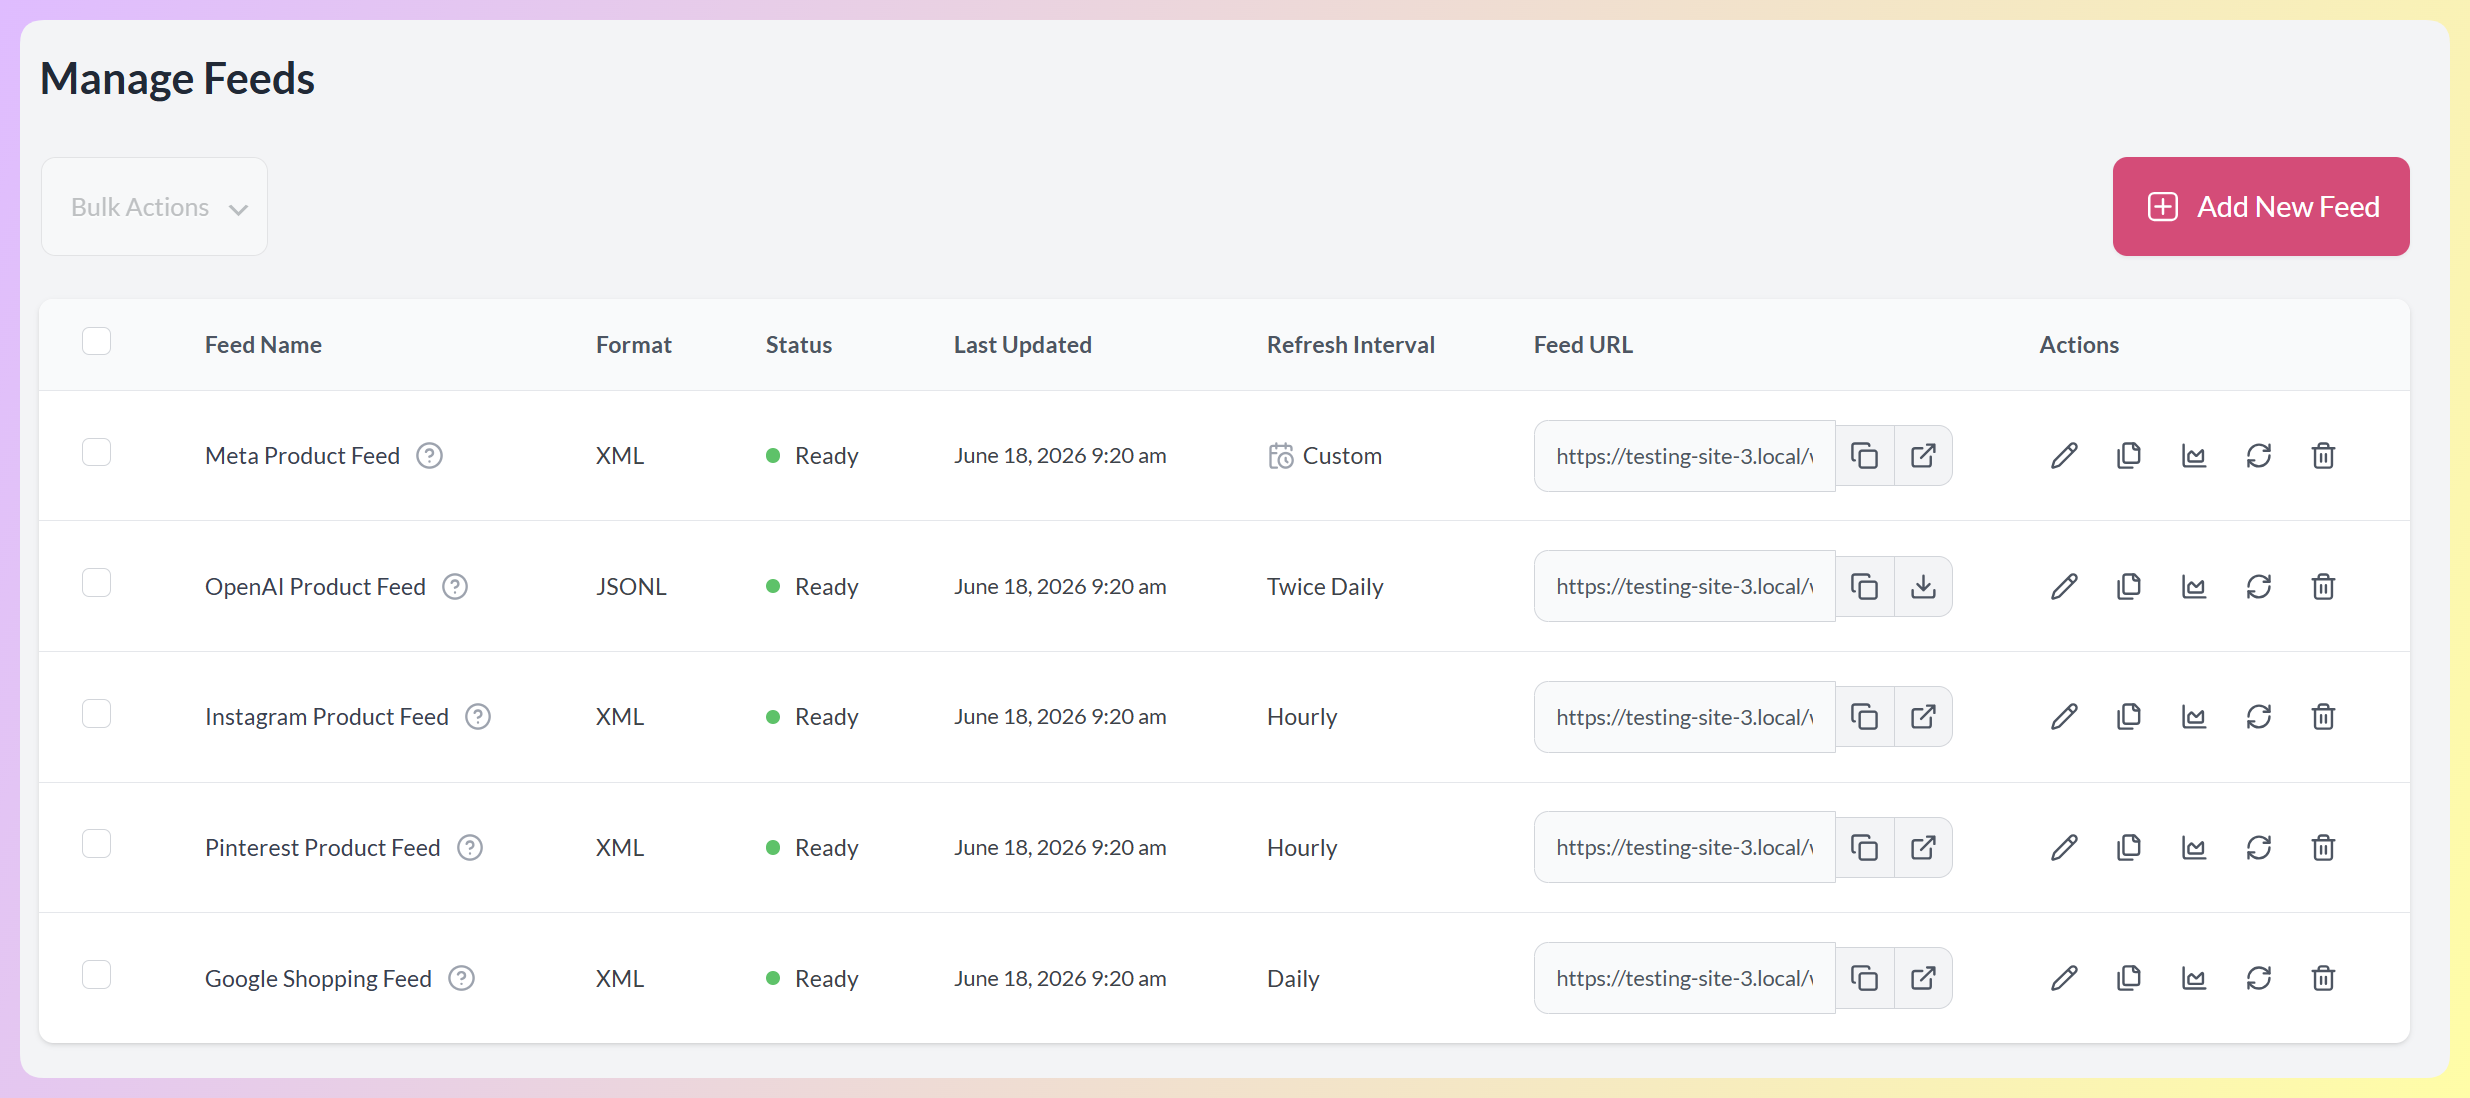
Now, copy this feed URL!
Step 2: Upload your custom feed to a sales channel
Next, log into your preferred sales channel and locate the page where you can upload product feeds. Then, simply enter your custom feed’s URL into the system. In most cases, this will require pasting your copied URL into a field.
Furthermore, you’ll likely have to enter other details, such as your target region and its language and currency. To ensure the success of your campaign, familiarize yourself with your chosen channel’s requirements and guidelines and do your best to comply with them.
Congratulations! The sales channel is now ready to showcase your offerings to its customer base!
Would you like more information on how to create product feeds? Then check out our article, “What Is A Product Feed And How Do You Create One? (Ultimate Guide).” This comprehensive guide covers the entire product feed creation process in great detail. In addition, it provides various strategies on how to ensure the success of your campaign.

Conclusion
Creating a custom feed for your product listings is a powerful way to ensure that your products stand out on various sales channels. By following the steps outlined in this guide, you can easily set up and optimize your custom feed to meet the unique specifications of your preferred platforms. This not only enhances your product visibility but also boosts your overall sales performance.
To recap, to use AdTribes to create a custom feed for your offerings, observe the following steps:
- Configure your custom feed’s general settings
- Perform field mapping
- Use filters and rules
- Configure your Conversion & Google Analytics settings
To upload your custom feed to a sales channel, you must:
Do you have any questions about custom product feeds? Let us know in the comments section!