ChatGPT now shows product recommendations when someone searches for something to buy. When a user asks “what’s the best hiking boot under $150?” or “find me a gift for a coffee lover,” ChatGPT can return real products, complete with images, prices, and a direct purchase link. To get your WooCommerce store into those results, you need to give OpenAI a structured product feed.
Product Feed Pro for WooCommerce (and its premium upgrade, Product Feed Elite) has a built-in OpenAI channel template. It maps your store data to every field ChatGPT expects, builds the feed file, keeps it updated on a schedule, and gives you a URL to register with OpenAI’s merchant portal.
This guide walks you through the full setup, from creating the feed to submitting it to OpenAI. You don’t need to touch any code.
What is an OpenAI product feed?
An OpenAI Product Feed is a structured export of your store’s products in a machine-readable format (JSONL.GZ, CSV.GZ, TSV.GZ) that OpenAI systems use to understand and recommend products.
You can think of it as your store’s “digital catalog” for ChatGPT.
Why connect to OpenAI?
Connecting your WooCommerce store to OpenAI helps you:
- Reach shoppers at the moment they ask ChatGPT for a buying recommendation
- Keep your prices, stock, and product data accurate across AI-driven platforms
- Provide structured product information to OpenAI’s shopping tools
What you need before you start
Make sure the following are in place before you begin:
- WooCommerce installed with published products that have titles, descriptions, images, and prices.
- Product Feed Pro (version 13.4.9 or later) or Product Feed Elite installed and activated. Earlier versions don’t include the OpenAI channel.
- A brand attribute set on your products — OpenAI requires this for every item. If you haven’t added brand data yet, see How to Add GTIN, MPN, Brand, and Other Product Attributes.
- An OpenAI merchant account — you’ll need this to register your feed URL once it’s generated. Apply at chatgpt.com/merchants. For technical requirements, see the OpenAI Agentic Commerce developer docs.
Steps to set up your feed
Step 1: Configure the general settings
- Open your WordPress dashboard
- Go to Product Feed → Manage feeds
- Click Add New Feed to open the feed creation wizard
- In the wizard, open the Channel dropdown and select OpenAI Product Feed. The plugin loads the OpenAI-specific field template automatically
- Fill in the general settings for your feed, using the table below as a guide:
| Setting | What to enter |
|---|---|
| Feed name | Something clear like OpenAI Feed – US so you can find it later. |
| Country | The market you’re targeting. Match this to your OpenAI merchant account’s registered country. |
| Include product variations | Turn this on if you sell variable products (e.g., shirts in different sizes or colours). Each variant gets its own row in the feed. |
| File format | JSONL.GZ (preferred), CSV.GZ, or TSV.GZ — OpenAI requires compressed feeds. Use JSONL.GZ unless you have a specific need for CSV.GZ or TSV.GZ; it ensures maximum compatibility and faster ingestion by OpenAI’s systems. CSV.GZ and TSV.GZ also work; CSV.GZ is easier to inspect manually. |
| Refresh interval | Hourly or Daily suits most stores. Pick hourly if your stock or prices change frequently. |
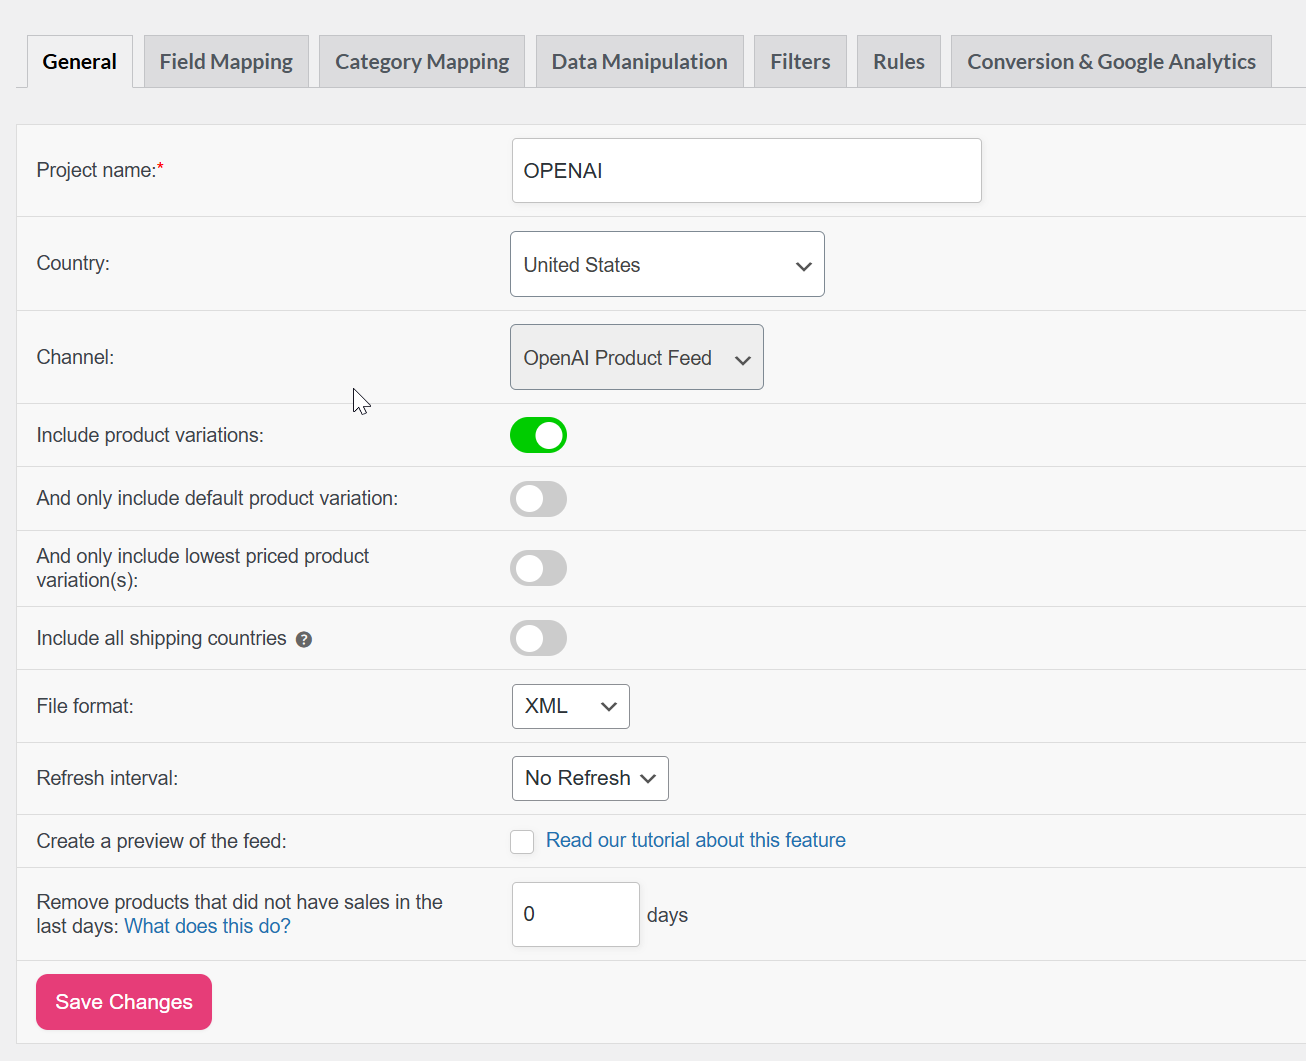
When you’re done, click Save & Continue.
For more details on the options available in the General tab, see Complete Guide to a Feed’s General Settings.
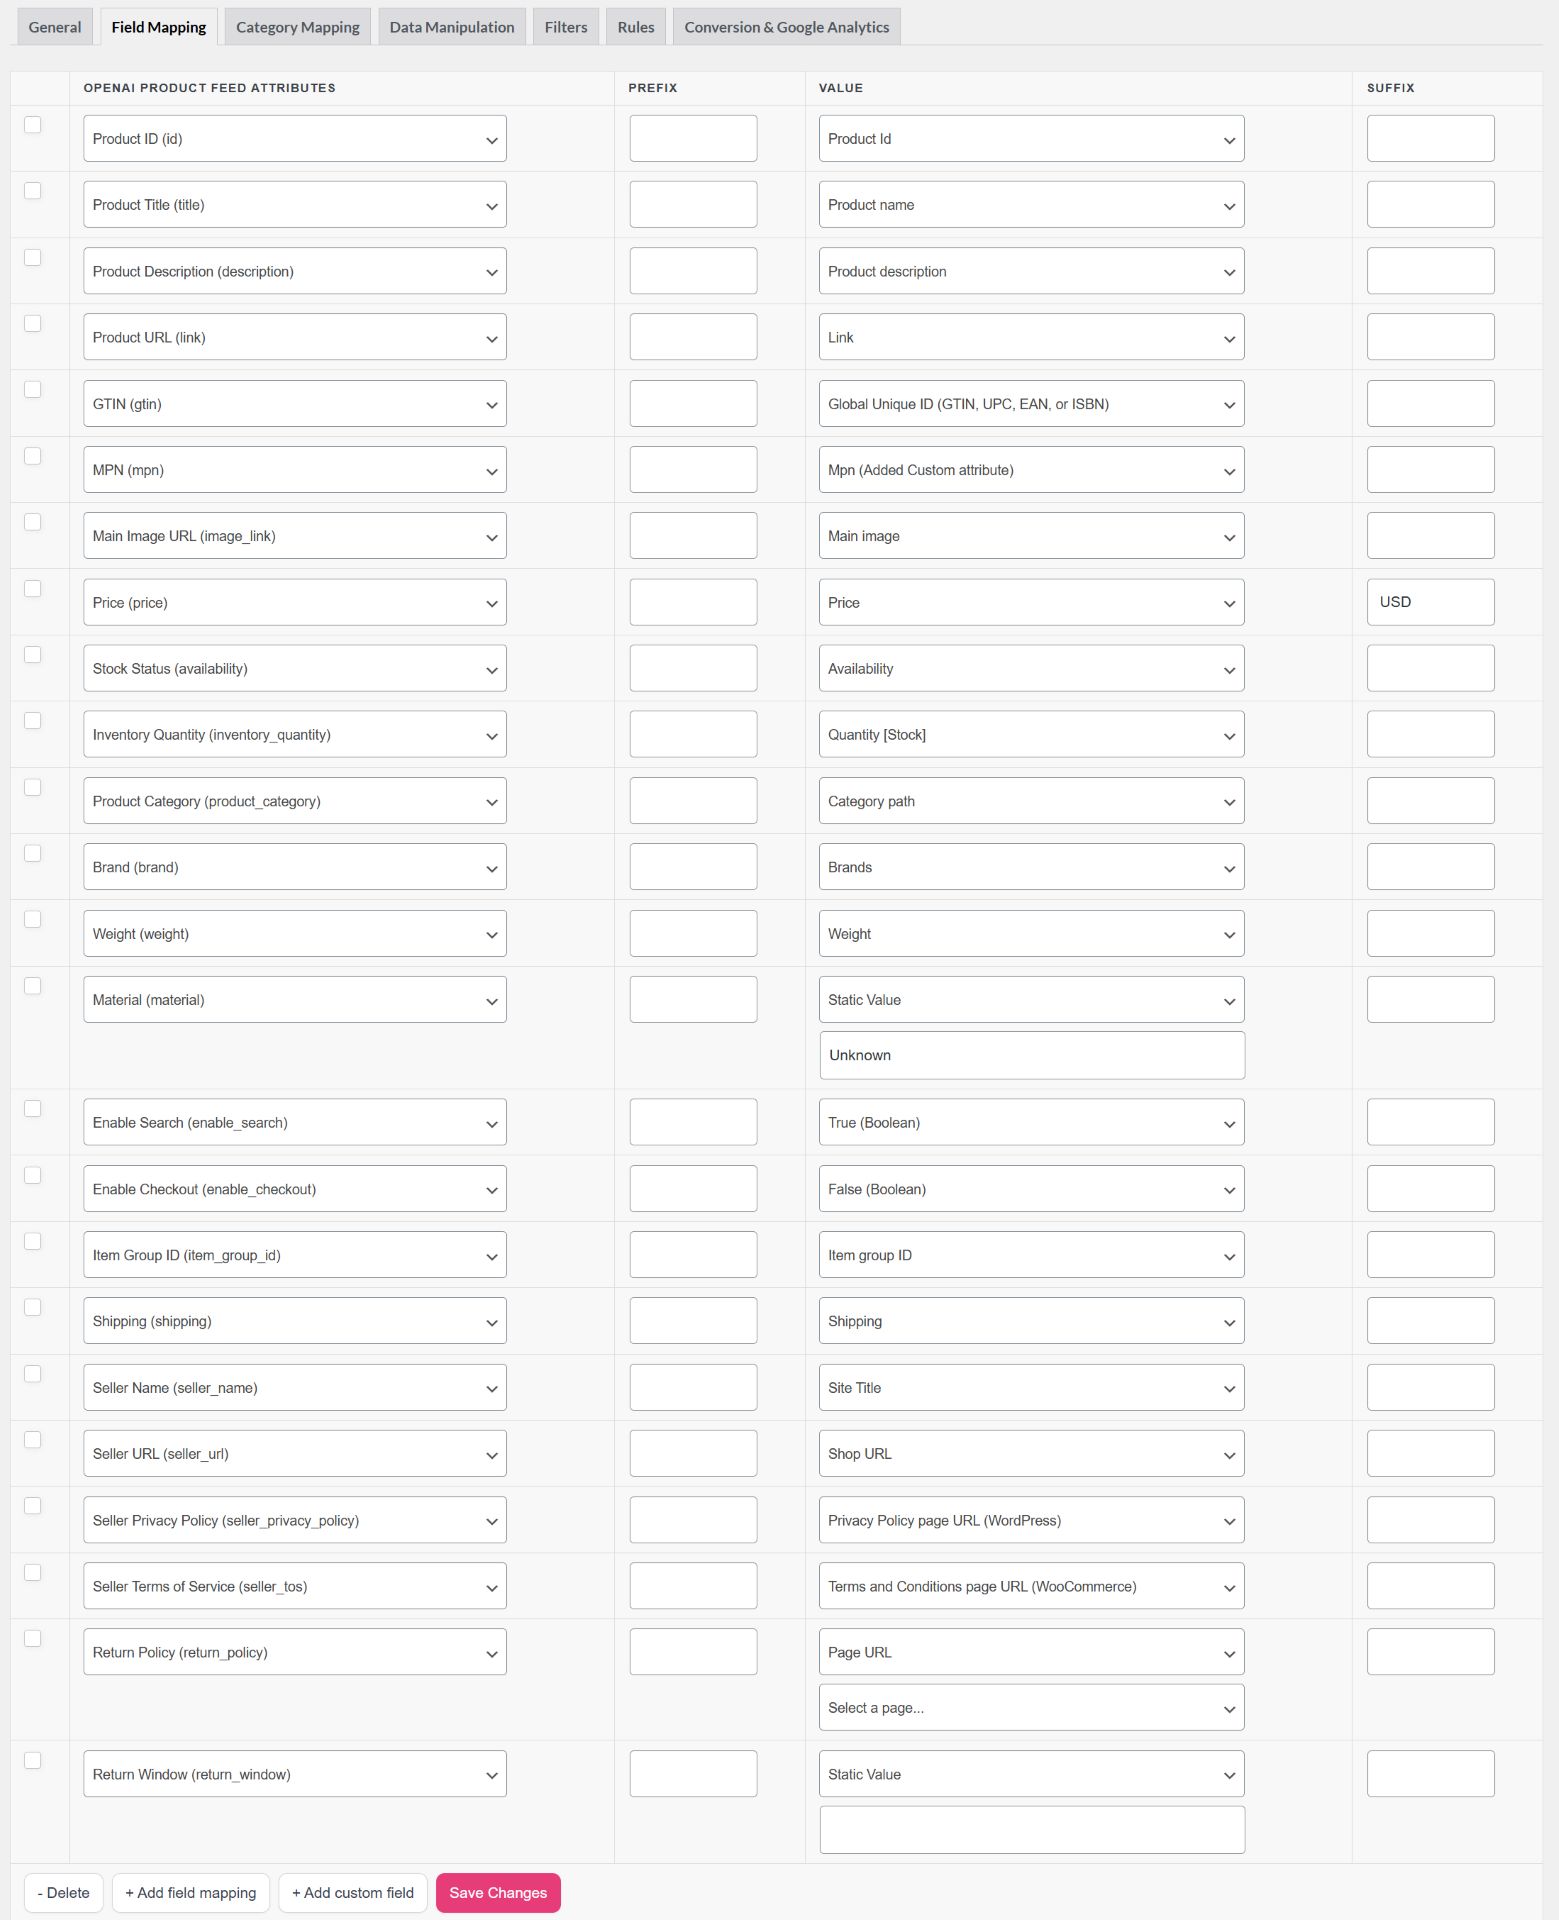
Step 2: Map the required attributes
The tables below cover every attribute OpenAI marks as required, grouped by type. Review each one before saving.
Basic product data
| OpenAI Attribute | Suggested Mapping | Notes |
|---|---|---|
| Product ID (id) | Product ID or SKU | Must be stable. Don’t change it after submission. OpenAI uses it to track products over time. Auto-filled by the plugin. |
| Product Title (title) | Product name | This is what shows in ChatGPT results. Keep it clear and accurate. Auto-filled. |
| Product Description (description) | Product description | Should differ from the title and accurately describe the product. Auto-filled. |
| Product URL (link) | Link | Must resolve to a live product page on your domain. Auto-filled. |
| GTIN (gtin) | Global Unique ID (GTIN, UPC, EAN, or ISBN) | The product’s EAN, UPC, or ISBN. Use the manufacturer-assigned value only. |
| MPN (mpn) | Mpn (Custom attribute) | Manufacturer Part Number. Use this when you don’t have a GTIN. |
Media
| OpenAI Attribute | Suggested Mapping | Notes |
|---|---|---|
| Main Image URL (image_link) | Main image | Use a high-quality image. Minimum recommended size is 500×500 px. Auto-filled. |
Price & promotions
| OpenAI Attribute | Suggested Mapping | Notes |
|---|---|---|
| Price (price) | Price | Auto-filled with currency. Format: 29.99 USD — a number, a space, then the ISO currency code. |
Availability & inventory
| OpenAI Attribute | Suggested Mapping | Notes |
|---|---|---|
| Stock Status (availability) | Availability | Auto-filled from WooCommerce stock. Accepted values: in_stock, backorder, preorder, out_of_stock, discontinued |
| Inventory Quantity (inventory_quantity) | Quantity (Stock) | Auto-filled from WooCommerce stock quantity. |
Item information
| OpenAI Attribute | Suggested Mapping | Notes |
|---|---|---|
| Product Category (product_category) | Category path | Maps to your WooCommerce product categories. Use the full category path where possible. |
| Brand (brand) | Brands or Static Value | Required for every product. Map to your brand attribute, or use a Static Value with your store name. |
| Weight (weight) | Weight | Auto-filled if the weight is set on the WooCommerce product. |
| Material (material) | Static Value | If you don’t track material, use a Static Value of Unknown to satisfy the requirement. |
Variants
| OpenAI Attribute | Suggested Mapping | Notes |
|---|---|---|
| Item Group ID (item_group_id) | Item group ID | Group all variants of the same product together. Auto-filled from the parent product ID. |
Fulfillment
| OpenAI Attribute | Suggested Mapping | Notes |
|---|---|---|
| Shipping (shipping) | Shipping | Auto-filled from your WooCommerce shipping zones. |
Merchant info
| OpenAI Attribute | Suggested Mapping | Notes |
|---|---|---|
| Seller Name (seller_name) | Site Title | Your store name. Auto-filled. |
| Seller URL (seller_url) | Shop URL | Your store’s homepage URL. Auto-filled. |
| Privacy Policy (seller_privacy_policy) | Privacy Policy page URL (WordPress) | Auto-filled. If empty, go to WP Admin → Settings → Privacy to assign your privacy policy page. |
| Terms of Service (seller_tos) | Terms and Conditions page URL (WooCommerce) | Auto-filled. Manually select the page from the WP Admin → WooCommerce → Settings → Advanced → Page Setup tab picker if it didn’t populate. |
Returns
| OpenAI Attribute | Suggested Mapping | Notes |
|---|---|---|
| Return Policy (return_policy) | Page URL | Select your returns policy page from the page picker. |
| Return Window (return_window) | Static value | Enter the number of days customers have to return items — e.g., 30. |
If seller_privacy_policy or seller_tos didn’t auto-fill, use the attribute picker to point them to the correct WordPress pages on your site.
You can find more values/product attributes from this article: Complete List of Product Attributes For Mapping
Step 3: Map recommended attributes (optional)
Recommended attributes aren’t strictly required, but they significantly improve how ChatGPT surfaces and ranks your products. Fill in as much of this data as your products support:
| OpenAI Attribute | Suggested Mapping | Notes |
|---|---|---|
| Additional Image URL (additional_image_link) | Additional image 1 (upto 10) | Gives ChatGPT richer visual context for your product. Up to 10 additional images supported. |
| Sale Price (sale_price) | Sale Price | Let ChatGPT show the discounted price to shoppers actively comparing deals. Same format as price (e.g., 19.99 USD). |
| Condition (condition) | Condition | Helps ChatGPT match products to queries that filter by condition. Use new for most stores. Accepted: new, used, refurbished. |
| Color (color) | Color attribute | Improves results for colour-specific queries (e.g., “red dress”). Word descriptions only — no hex codes (e.g., Forest Green, not #228B22). |
| Size (size) | Size attribute | Improves results for size-filtered shopping queries. Map to your WooCommerce size attribute. Important for apparel. |
| Gender (gender) | Gender attribute | Helps ChatGPT target gender-specific shopping queries. Accepted: male, female, unisex. |
| Age Group (age_group) | Age group attribute | Helps ChatGPT match products to age-appropriate queries. Accepted: newborn, infant, toddler, kids, adult |
For help adding colour, size, brand, or condition to your products, see the brand and GTIN setup guide.
Step 4: Review the OpenAI flags (optional)
Scroll down to the OpenAI Flags section in your attribute mapping. These two fields are required by OpenAI but the plugin auto-populates safe defaults for both — reviewing them is optional for most stores.
| Flag | Default | What it does |
|---|---|---|
enable_search | true | Controls whether your products appear in ChatGPT search results. Leave this as true — setting it to false removes your products from ChatGPT entirely. |
enable_checkout | false | Controls whether customers can complete a purchase directly inside ChatGPT (Instant Checkout). To enable this, you also need to complete OpenAI’s Agentic Commerce Protocol integration and connect an approved payment provider such as Stripe. Leave as false until you’ve completed that setup. |
These flags are also available as extra fields through the Product Feed Elite plugin, which lets you set them individually for each product.
You can enable them from Product Feed → Settings → Extra fields.

Once enabled, the fields appear inside the product editor so you can toggle search and checkout on a per-product basis.
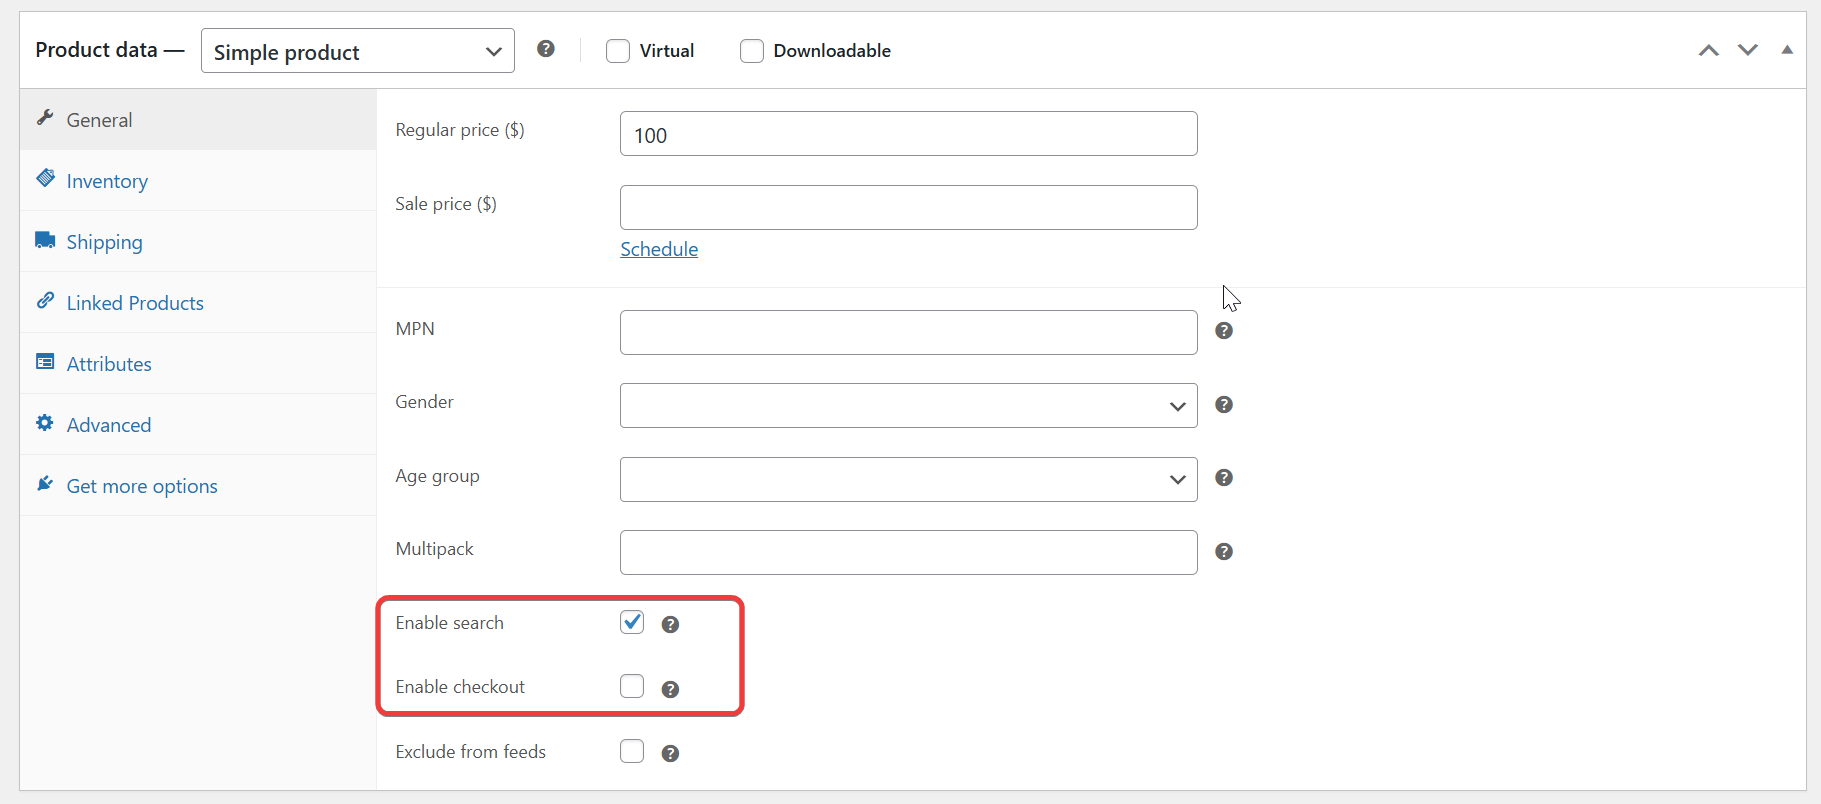
If you’ve already set the OpenAI flags inside each product, you can map those custom fields in the feed so the values you assigned per product are passed through correctly. This makes sure the feed uses the product-level settings you configured, rather than a single global value.

Step 5: Add filters or rules (optional)
If you want to exclude certain products from your ChatGPT feed, for example, out-of-stock items, specific categories, or products below a minimum price, set that up in the Filters step. Similarly, you can use Rules to modify attribute values on the fly, such as prepending your brand name to every title.
See How to Create Filters for Your Product Feed and How to Create Rules for details.
Step 6: Conversion & Google Analytics (optional)
This step lets you add tracking parameters to your product URLs so you can measure traffic and performance once your products appear through AI-driven platforms.
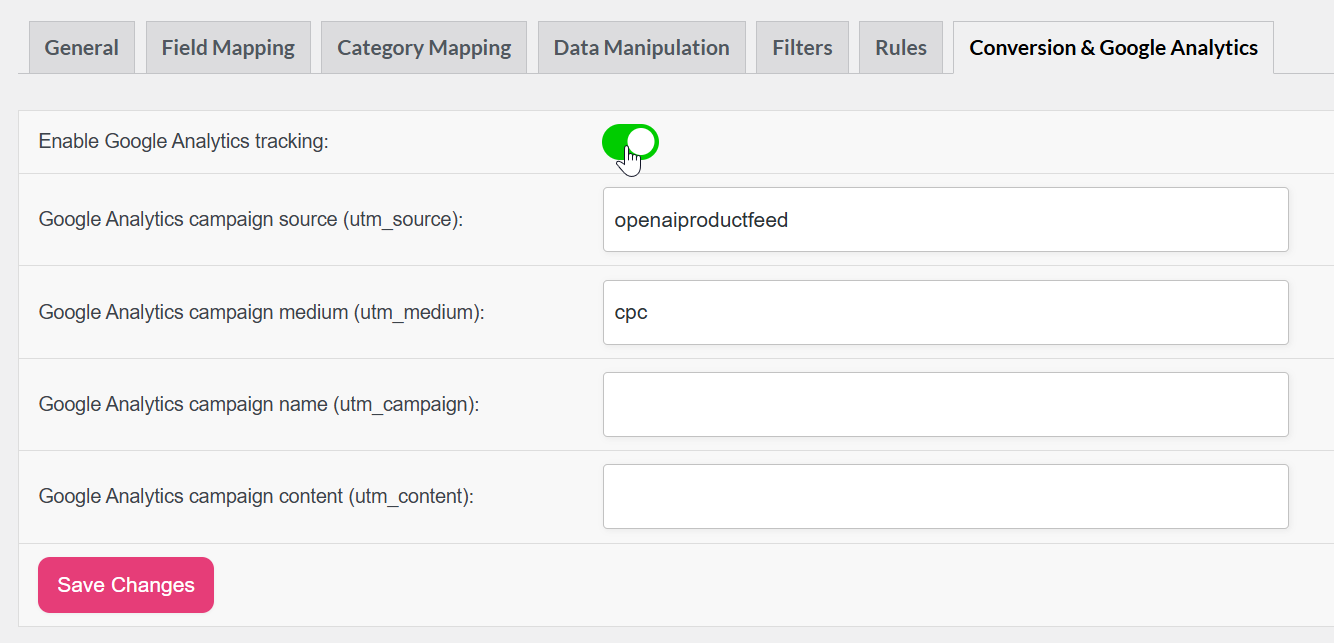
Under the Conversion & Google Analytics tab, you can:
- Append UTM parameters (e.g.,
utm_source=openaiproductfeed&utm_medium=cpc) to your product links. - Track feed-driven visits in Google Analytics or GA4.
- Evaluate which AI-driven recommendations bring the most engagement.
Step 7: Generate the feed and copy the URL
Once you’re happy with the mapping, click Generate Product Feed. The plugin processes your catalogue and creates the feed file. When generation finishes, open the feed details and copy the Feed URL shown there — that’s the HTTPS address you’ll give to OpenAI.
Keep in mind that the URL must use HTTPS — OpenAI won’t accept plain HTTP. Also, don’t put your feed behind a login or a firewall rule that blocks external crawlers. The plugin refreshes the file automatically based on the interval you set in Step 1, so OpenAI will always fetch fresh data.
Submit your feed to OpenAI
After you generate your feed, send it to OpenAI for review and indexing. Your products can then appear in ChatGPT’s shopping results.
- Go to chatgpt.com/merchants and fill out the merchant application. You need approval before uploading feeds.
- After approval, OpenAI will give you a secure upload link and login details. Use these to send your product feed safely.
- Upload your JSONL.GZ, CSV.GZ, or TSV.GZ feed file created with Product Feed Pro (see the File format row in Step 1 for guidance on which to choose). Make sure your file includes key details such as ID, title, description, link, price, and availability.
- OpenAI will check your feed automatically to make sure the format and data are correct. You can upload updates daily or weekly, depending on how often your products change.
- When your feed passes validation, your products are added to ChatGPT’s AI shopping system, where customers can find and view them through natural conversation.
For full technical details, visit the OpenAI Product Feed Specification.
Troubleshooting
enable_search is true and that all required fields (especially brand, gtin or mpn, image_link, and availability) are mapped and populated.item_group_id is mapped. Without it, variable product variants won’t group correctly.Frequently asked questions
Unknown. That satisfies the requirement without any product-level data entry.enable_checkout to true in the OpenAI Flags section, but that alone isn’t enough. You also need to complete OpenAI’s Agentic Commerce Protocol integration and connect an approved payment provider. Contact OpenAI’s commerce team for details on the checkout onboarding process.Need more help?
Product Feed Elite users: reach the AdTribes support team directly and our team will take a look.
Product Feed Pro users: post a new topic on the WordPress.org support forum and the team will get back to you there.
For questions specific to OpenAI’s merchant onboarding or feed submission, the OpenAI Agentic Commerce documentation is the best place to start.